How to make Tzimmes for Rosh Hashana

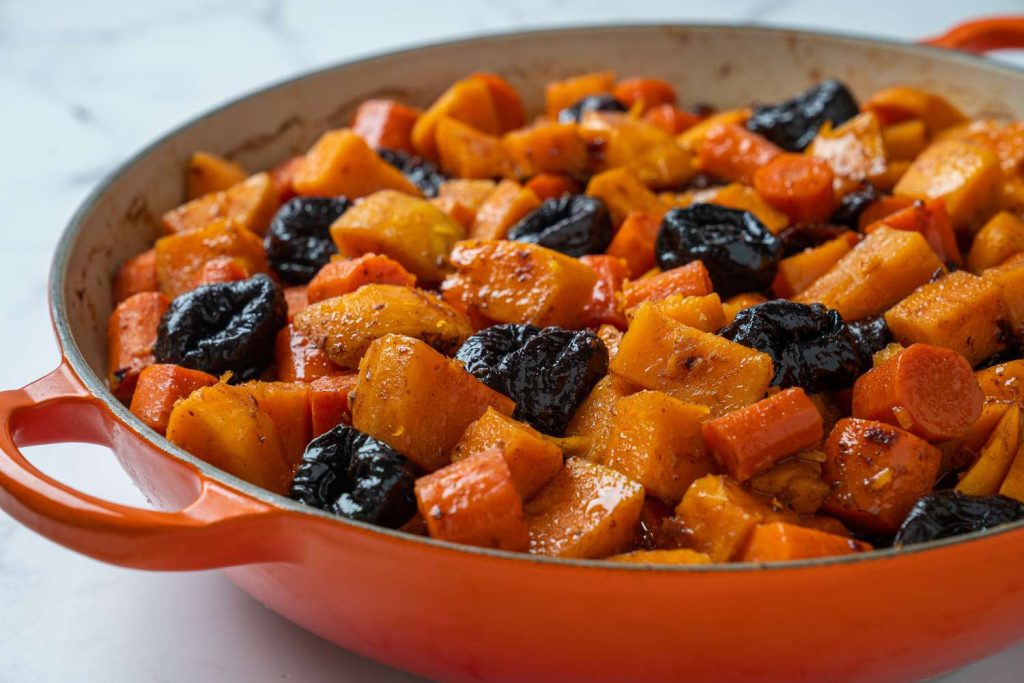
Here’s a delicious and traditional Tzimmes recipe, perfect for Rosh Hashanah or any holiday meal. It’s a sweet and savory dish made with root vegetables, dried fruits, and honey.

Ingredients:

  • 1 pound carrots, peeled and sliced
  • 2 large sweet potatoes, peeled and cubed
  • 1 cup dried apricots, halved
  • ½ cup pitted prunes
  • ½ cup raisins
  • 1 teaspoon ground cinnamon
  • ½ teaspoon ground nutmeg
  • ¼ teaspoon salt
  • ¼ cup honey
  • 2 tablespoons brown sugar (optional, for extra sweetness)
  • 2 tablespoons orange juice
  • 2 tablespoons olive oil or butter
  • 1 cup water or vegetable broth
  • Optional: A few small chunks of brisket for a meat version

Instructions:

  1. Preheat the Oven: Preheat your oven to 350°F (175°C).
  2. Prepare Vegetables and Fruits: In a large mixing bowl, combine the carrots, sweet potatoes, apricots, prunes, and raisins.
  3. Make the Sauce: In a small bowl, whisk together the honey, brown sugar (if using), cinnamon, nutmeg, orange juice, and olive oil (or butter). Add the water or broth and stir well.
  4. Combine Ingredients: Pour the sauce over the vegetable and fruit mixture, stirring to coat everything evenly.
  5. Bake the Tzimmes: Transfer everything to a large baking dish and cover with foil. Bake for about 1 hour, or until the vegetables are tender. Stir once or twice during baking to ensure even cooking.
  6. Optional Meat Addition: If adding brisket, nestle the chunks of brisket into the tzimmes mixture before baking. Cook the same way until the brisket is tender.
  7. Serve: Once done, remove from the oven, uncover, and let cool slightly before serving.

Tips:

  • Customize: You can add other root vegetables like parsnips or butternut squash.
  • Sweetness: Adjust the sweetness by adding more honey or brown sugar, depending on your preference.
  • Texture: If you prefer a richer texture, mash some of the vegetables slightly before serving.

This Tzimmes is comforting and sweet, perfect for symbolizing a prosperous new year during Rosh Hashanah!

How to make honey cake for Rosh Hashanah

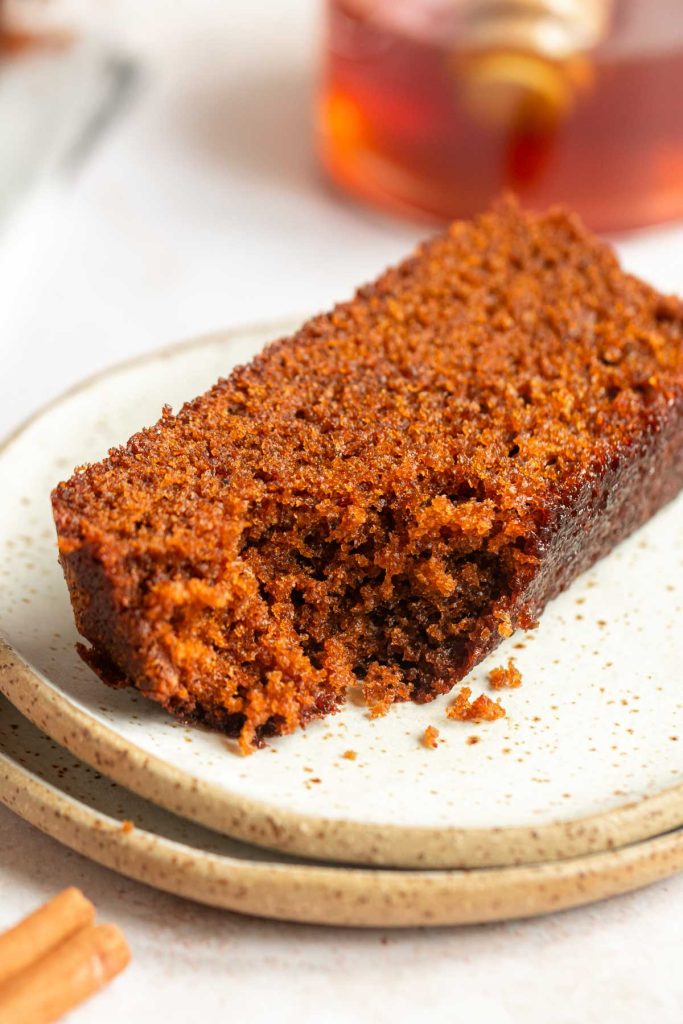
Honey cake for Rosh Hashana

Honey cake is a cherished Rosh Hashanah tradition, symbolizing a sweet and prosperous new year. The honey in the cake represents abundance and blessings in Jewish culture.

Serving honey cake honors cultural heritage and unites families to celebrate new beginnings with sweetness. We make this cake every year and it disappears in minutes from how good it is.

Here’s a classic Honey Cake recipe for Rosh Hashanah that’s rich, moist, and perfect for celebrating the sweet new year:

Ingredients:

  • 3 ½ cups all-purpose flour
  • 1 tablespoon baking powder
  • 1 teaspoon baking soda
  • 1 teaspoon cinnamon
  • ½ teaspoon ground cloves (optional)
  • ½ teaspoon ground allspice (optional)
  • 1 cup vegetable oil
  • 1 cup honey
  • 1 ½ cups sugar
  • ½ cup brown sugar
  • 3 large eggs
  • 1 teaspoon vanilla extract
  • 1 cup warm coffee or tea
  • ½ cup orange juice
  • ¼ cup whiskey (optional, but adds a rich flavor)
  • ½ cup sliced almonds for topping (optional)

Instructions:

  1. Preheat the Oven: Preheat your oven to 350°F (175°C). Grease and flour a 9×13-inch cake pan, or use two loaf pans.
  2. Mix the Dry Ingredients: In a large bowl, whisk together the flour, baking powder, baking soda, cinnamon, cloves, and allspice.
  3. Combine Wet Ingredients: In a separate large bowl, whisk together the oil, honey, sugars (both white and brown), eggs, and vanilla until smooth.
  4. Add Coffee, Orange Juice, and Whiskey: Gradually add the coffee (or tea), orange juice, and whiskey (if using) to the wet ingredients and stir well.
  5. Combine Wet and Dry Ingredients: Slowly add the dry ingredients to the wet mixture in batches, stirring until just combined. Be careful not to overmix.
  6. Bake: Pour the batter into your prepared pan(s). If desired, sprinkle sliced almonds on top. Bake for 45–55 minutes, or until a toothpick inserted into the center comes out clean.
  7. Cool: Let the cake cool in the pan before transferring it to a wire rack.

Tips:

  • Honey cake gets better with time. If possible, bake it a day or two before serving for the flavors to fully develop.
  • For an extra moist cake, lightly brush it with additional honey after it’s cooled.

This honey cake is aromatic with spices and rich in sweetness, making it a perfect treat for Rosh Hashanah!

How to cook a fish head for Rosh Hashanah

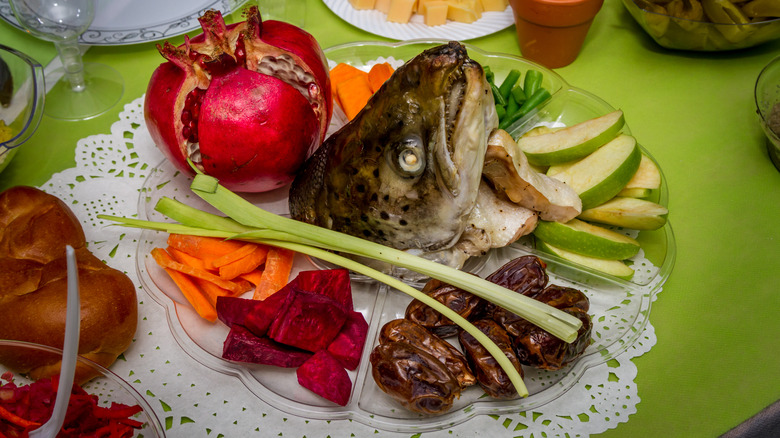
At Rosh Hashanah, it’s a customary practice to have a fish head on your table and to take from it as a reminder that you should act like the head in life and not the feet.

Prepare like gefilte fish.

1 fish head

2 carrots

1 medium onion

1 tsp salt

1/2 tsp pepper

7 Tbsp sugar

Cut two carrots and peel one medium onion. Add to 6 cups of water with 1 tsp salt, 1/2 tsp pepper, 7 tablespoons sugar (if you like a sweet fish…change amount as suited). Bring to boil. Add fish head. Lower heat to simmer and cover. Simmer for 1 hr – 1 hr and a 1/2. Head will be done when flakes with a fork.

This should keep in your fridge throughout Yom Tov. Wrap well in a plastic container to prevent entire fridge from smelling. It is taken out for each meal. Remember to remove it before serving meat.

Rosh Hashanah Round Challah Recipe: Bake a Sweet Jewish New Year Tradition

The Perfect Rosh Hashanah Round Challah Recipe for Your Holiday Table

Rosh Hashanah, the Jewish New Year, is synonymous with sweet traditions, and none is more iconic than the round challah. This Rosh Hashanah round challah recipe will guide you through creating this symbolic bread, perfect for your holiday celebrations.

Why Make a Round Challah for Rosh Hashanah?

The round shape of this special Rosh Hashanah challah represents:

  • The cyclical nature of the year
  • Continuity of creation
  • Hope for a “well-rounded” year ahead

Unlike the braided challah served on Shabbat, this Rosh Hashanah round challah recipe produces a circular loaf, often studded with raisins for added sweetness – a key theme of the holiday.

Rosh Hashanah Round Challah Recipe

Ingredients:

  • 4 cups all-purpose flour
  • 1/4 cup sugar
  • 1 packet active dry yeast (2 1/4 teaspoons)
  • 1 1/2 teaspoons salt
  • 2 large eggs + 1 for egg wash
  • 1/4 cup vegetable oil
  • 1/2 cup warm water
  • Optional: 1/2 cup raisins, poppy seeds, or sesame seeds for topping

Instructions:

  1. Mix dry ingredients: Combine flour, sugar, yeast, and salt in a large bowl.
  2. Prepare wet ingredients: In a separate bowl, whisk 2 eggs, oil, and warm water.
  3. Form dough: Gradually add wet to dry ingredients, mixing until a dough forms. Incorporate raisins if using.
  4. Knead: On a floured surface, knead dough for about 10 minutes until smooth and elastic.
  5. First rise: Place dough in an oiled bowl, cover, and let rise in a warm place for about 1 hour or until doubled.
  6. Shape: Punch down dough, divide into 3 parts, and roll each into an 18-inch rope.
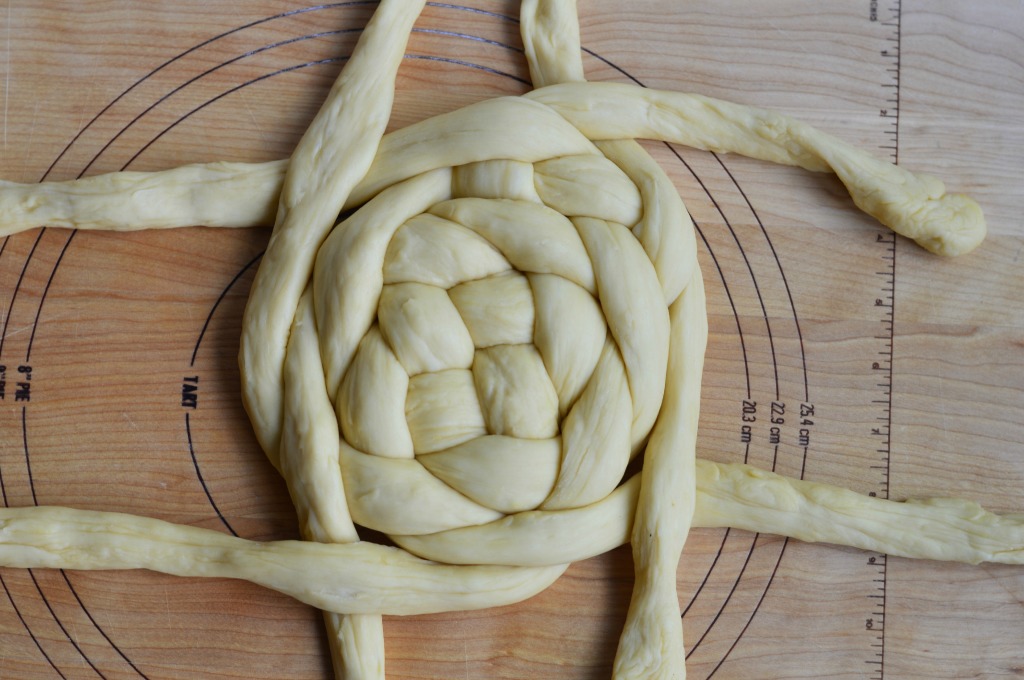
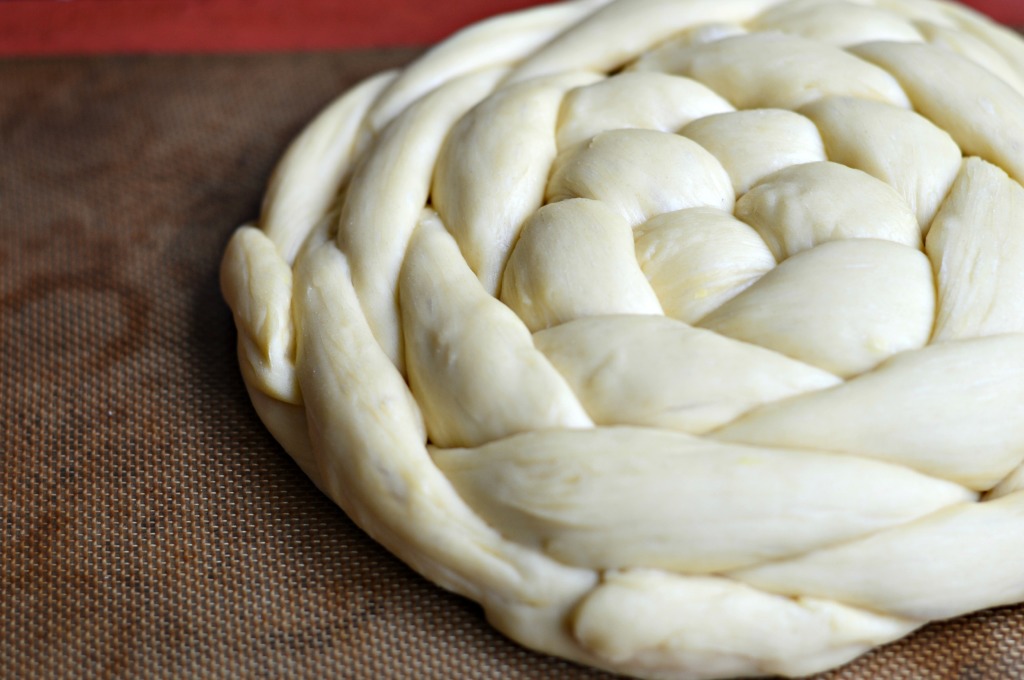
  1. Create round shape: Braid the ropes, then form into a circle, pinching ends to seal.
  1. Second rise: Place on a baking sheet, cover, and let rise for 30 minutes.
  1. Preheat: Set oven to 350°F (175°C).
  2. Prepare for baking: Brush challah with beaten egg and add optional seed topping.
  3. Bake: 30-35 minutes or until golden brown and hollow-sounding when tapped.
  4. Cool: Let the Rosh Hashanah round challah cool on a wire rack before serving.

Why do we eat a round challah on Rosh Hashanah?

The reason that we do the round challah, versus the braids, for Rosh Hashana, is because the year is round, it represents that idea. This looks like a crown, for crowning God as king on Rosh Hashana.

Serving Your Rosh Hashanah Round Challah

Traditionally, this Rosh Hashanah round challah recipe is served with honey, symbolizing wishes for a sweet new year. Some families also add apple slices for dipping in honey, creating a complete Rosh Hashanah sweet treat.

By following this Rosh Hashanah round challah recipe, you’re not just baking bread – you’re participating in a meaningful tradition that connects you to Jewish heritage and the hopeful spirit of the New Year.

Shana Tova! May your year be as sweet as this homemade Rosh Hashanah round challah.

Revolutionize Your Kitchen With The Kfp0711 7 Cup Food Processor: The Must-Have Appliance For Any Food Lover

If you’re someone who loves spending time in the kitchen, you know that preparing ingredients can take up a significant amount of time. From chopping to dicing, it can be a frustrating and time-consuming process. But with the KFP0711 7 Cup Food Processor, you can cut down on prep time and spend more time cooking and enjoying your meals.With the KFP0711, you’re not only saving time, but also ensuring consistent results every time with minimal effort. Having the right tool can make the difference between a frustrating experience and one where you feel confident and in charge of your kitchen.

Whether you’re a professional chef or a home cook, the KFP0711 is an essential tool that can transform your cooking experience from average to exceptional. This food processor is designed to save you time and effort in the kitchen, allowing you to focus on experimenting with new recipes and flavors. With the KFP0711 in your kitchen, you can create gourmet meals without the usual fuss and mess, and produce impressive results with little effort. The KFP0711 is an appliance that can take your cooking to the next level.If you’re someone who loves cooking and experimenting with new recipes, you’ll appreciate how the KFP0711 can make your life in the kitchen much easier. With the KFP0711, you can save time and energy preparing ingredients, allowing you to focus on the fun part of cooking: the creative process of combining flavors and textures to create delicious meals. This food processor is the perfect investment for anyone who takes cooking seriously, whether you want to make a quick salad or whip up a complex sauce.

Why You Need the KFP0711 in Your Kitchen

With the KFP0711 7 Cup Food Processor, you’ll be able to take on any kitchen task with ease. From processing hummus, kneading dough and shredding cheese – this powerful machine does it all. Not only does it save you time, but it also makes your food prep experience more enjoyable. The attachments that come with the food processor ensure that the user can slice, dice or shred any ingredient to desired size. Hence, cooking with this product is a breeze no matter the ingredient – be it fruits, vegetables or even nuts.With the KFP0711, you’ll also be able to produce consistent results every time you use it. This is especially helpful for recipes that require uniform cuts. You no longer have to worry about unevenly sliced onions, irregularly chopped carrots, or poorly blended hummus. Instead, the KFP0711 delivers flawless results leaving you with more time to experiment with new recipes or simply relax. Its compact size is also perfect for those with limited counter space or storage area.

But what really sets the KFP0711 apart from other food processors is the level of control that it provides. With its pulse feature, you can more precisely chop, shred and puree ingredients. This is crucial for when you want a coarser or finer texture, or simply want to avoid over-processing something. The adjustable slicing disc is also a great feature that gives the user the flexibility to choose exactly how thick or thin their slices will be. Everything is at the fingertips of the user, making food prep an efficient and effortless experience. Overall, the KFP0711 that offers an extensive range of features is a fabulous tool for anyone who loves to cook.

Features and Accessories of the KFP0711

The KFP0711 7 Cup Food Processor is designed to be both powerful and versatile. With a 250 watt motor and multiple blade options, it can handle even the toughest of ingredients with ease. The machine comes with a multipurpose blade for general use, a dough blade for kneading bread and pizza doughs, a reversible shredding blade that produces shredding results of varying coarseness and an adjustable slicing disc that lets you slice ingredients to your desired thickness. These blades are easy to install and with the pulse button, you maintain the ultimate control over the texture of your ingredients.

The KFP0711 7 Cup Food Processor is not just a powerful kitchen appliance, but it offers a range of accessories that make it more versatile than other food processors on the market. It comes with a spatula which helps with easy transfer of processed foods from the machine to a serving dish, as well as a shredding disc, dough blade, and multipurpose blade. The machine’s bowl, lid, and blades are also dishwasher-safe, making cleaning up after use a breeze. With all of these features at your fingertips, the KFP0711 will quickly become your go-to tool for all your kitchen needs!

Cleaning and Maintenance Tips for Your KFP0711

The KFP0711 7 Cup Food Processor is also designed with safety in mind. It has an auto shut-off feature that prevents the motor from running when it’s not correctly assembled. Meaning that the bowl and the lid must be locked and aligned correctly before the motor is activated. This feature prevents food or liquid from damaging the motor when there is an accidental spillage, adding an extra layer of safety to your kitchen. The KFP0711 also has a non-slip base, which keeps the machine in place while in use.

The KFP0711 7 Cup Food Processor is compact and lightweight, making it ideal for everyday use in any kitchen. Its compact design means it is easy to store in a cabinet or on a countertop, so it’s always accessible when you need it. Its weight also makes it easy to move around, so whether you are cooking in your home kitchen or transporting ingredients for a potluck party, the KFP0711 is easy to bring along.When it comes to cooking just the way you like it, the KFP0711 7 Cup Food Processor is the kitchen gadget you don’t want to miss. Its easy-to-use controls and accessories make it a highly reliable resource in your kitchen. With its compact size that can accommodate seven cups, it can help chop vegetables, grind cheese, and blend sauces like a miracle. The KFP0711 7 Cup Food Processor is also easy to clean and takes up minimal space in your cabinets. It is an excellent kitchen gadget that would save you time, ensure consistency and reduce food waste.

Conclusion

The KFP0711 7 Cup Food Processor is the perfect appliance for anyone looking for fast and efficient meal prep. Whether you’re a busy parent working long hours or a home cook looking to explore new recipes, this food processor is a must-have in your kitchen. By offering not only speedy chopping and grinding, but also ultimate control over the texture of the ingredients, the KFP0711 is truly a life-changing appliance. Investing in this appliance will not only save you time but also help you to create delicious and healthy meals for you and your loved ones effortlessly. With its sleek design, powerful motor and versatile accessories, you’ll wonder how you ever cooked without it!

In conclusion, the KFP0711 7 Cup Food Processor is a game-changer in any kitchen. It can chop, slice, shred, and puree ingredients with ease, and its user-friendly design makes it easy for anyone to master. Moreover, it is compact, lightweight, and comes with a variety of accessories, so you can use it for almost any recipe you can imagine. Its auto shut-off feature ensures safety while it allows you to maintain control over the texture of your ingredients. By investing in the KFP0711, you’ll be saving yourself time, energy, and hassle in the kitchen. This reliable gadget is worth considering for any food lover, professional chef or home cook alike. Transform your cooking routine and start exploring new recipes with the KFP0711 7 Cup Food Processor!

Mastering The Art Of Receiving Food Deliveries: Tips And Etiquette

Food delivery is a convenient way to satisfy your cravings without leaving the comfort of your home. A vast array of restaurants are now offering this service, making it more accessible for everyone. However, receiving food deliveries is not just about the food, but also about the experience. In this blog post, we will share some valuable insights and useful tips on how to become a pro at receiving food deliveries.Receiving a food delivery can be an enjoyable and hassle-free experience, but it requires some preparation and communication. By following some simple guidelines and etiquette, you can ensure that you get your food on time and in a satisfactory condition.

Whether you are new to food delivery or a seasoned foodie, our comprehensive guide will provide you with everything you need to know to master the art of receiving food deliveries. From preparing for the delivery to disposing of the packaging, we’ve got you covered. So, let’s get started and make your food delivery experience a seamless one.To make your food delivery experience a pleasant one, we’ll outline the necessary steps that you should take to ensure everything goes according to plan. Preparing for the delivery is the first step in receiving a food delivery, and it involves checking your order confirmation, delivery address, and estimated time of arrival. By doing so, you can avoid any confusion or delays that may occur.

After checking your order confirmation, take some time to prepare for the delivery in advance. This includes cleaning up your doorstep and putting on some decent clothing. Remember, first impressions matter, and you want to look presentable when you receive the delivery person. It’s also essential to prepare the necessary payment method and have some cash in hand in case there are any unexpected charges.

Preparing for the Delivery

Preparing for a food delivery can be a simple and hassle-free task if done right. Checking your order confirmation, delivery address, and estimated time of arrival can save you time and prevent any confusion with the delivery person. Additionally, it’s essential to have a clean and tidy doorstep to make the transaction as smooth as possible. Don’t forget to put on some decent clothing and have the necessary payment method ready. Having cash on hand can also come in handy in case there are any unexpected charges.When preparing for a food delivery, it’s not only important to have a clean doorstep and the right payment method ready, but also to pay attention to any special instructions or requests you may have. For instance, if you live in a building with multiple entrances, make sure to specify which entrance the delivery person should use. Moreover, if you have any allergies or dietary restrictions, inform the restaurant in advance to avoid any mistakes in your order. Following these tips can help ensure a successful and enjoyable food delivery experience.

Another important aspect of preparing for a food delivery is being aware of the delivery time. Most delivery services provide users with an estimated delivery time that allows them to prepare for the delivery accordingly. If you ordered your meal well in advance, make sure to be available during the estimated delivery time to avoid any unnecessary delays. Additionally, it’s always good to have a backup plan in case the delivery person arrives earlier or later than expected. You can also track your order in real-time using many food delivery apps, so make sure to take advantage of this feature to stay updated on the delivery status. By following these guidelines, you can make sure that you are fully prepared for any food delivery, and ensure a smooth and hassle-free experience.

Receiving the Delivery

Lastly, it’s important to have the right attitude when receiving a food delivery. Always be polite and courteous to the delivery person, and thank them for their service. Tipping the delivery person is also a great way to show your appreciation for their work and ensure good service in the future. Furthermore, if you have any issues or concerns with your delivery, address them with the delivery person in a calm, constructive manner. Being rude or hostile will only make the situation worse, and may result in a negative experience for both parties. By following these practices, you can maintain a positive and pleasant experience when receiving a food delivery.

It’s worth noting that sometimes unexpected things can happen during a food delivery. Your order may be delayed due to traffic, or there may be issues with the restaurant preparing your meal. In such situations, it’s crucial to remain patient and understanding. Keep in mind that the delivery person has no control over these circumstances, and they are doing their best to deliver your meal as quickly and efficiently as possible. If you need to contact the restaurant or delivery service, do so in a polite and professional manner, and communicate your concerns clearly. Remember that clear communication is key to resolving any issues and ensuring a positive experience.

Follow-up

When the delivery person arrives, greet them with a smile. It’s always nice to be greeted warmly, and it sets a friendly tone for the rest of the interaction. If the delivery person has multiple orders to deliver, be patient and courteous while they organize the orders and complete the transactions.After checking the items that have been delivered, and verifying that everything is in order, don’t forget to thank the delivery person. It’s a job that can be challenging and time-consuming, so it’s always good to show appreciation for their efforts. Also, keep in mind that if you requested any special instructions, like specific gate codes or proximity to a certain location, it’s always helpful to offer those details again at the time of delivery to avoid confusion.

Regarding tipping, it’s customary to tip delivery drivers 10-20% of the total cost of the food. However, if the delivery fee included gratuity, you don’t need to tip extra. Be sure to have cash ready if you plan on tipping in cash, and always tip in American currency. If you’re unable to tip for any reason, a simple verbal thank you is still kind and appreciated. Remember, delivery drivers rely on tips to supplement their income, so tipping generously is always appreciated and helps them make a living.When tipping, consider leaving a little extra during difficult weather conditions or when the delivery person has gone above and beyond their regular duties. Additionally, if the food arrived early or was still hot and fresh upon arrival, that’s also a good reason to show your appreciation by tipping a little extra. Remember, a little kindness can go a long way towards making someone’s day.

Conclusion

Communication is key when receiving a food delivery. If you won’t be home, make arrangements for a neighbor or friend to take the delivery and let the delivery person know ahead of time who will be accepting the order. If there are any issues with the delivery or you have special instructions, don’t hesitate to inquire and inform the delivery person. If you notice that something is missing or incorrect, politely ask for assistance to remedy the situation. Moreover, if the delivery person is having difficulty locating your address, try to provide detailed information or landmark to help guide them. By making sure that communication is clear and respectful, you can help ensure that your food delivery experience goes as smoothly as possible.

Lastly, if you’re concerned about the safety of receiving a food delivery during the COVID-19 pandemic, there are some extra precautions you can take, such as opting for contactless delivery and wearing a mask when accepting the delivery. Make sure to sanitize your hands before and after handling the deliveries, and wipe down any surfaces that the delivery was placed on. It’s essential to follow the latest health guidelines to ensure your safety and the safety of others around you. With some careful planning and communication, you can enjoy your food and support local restaurants without worrying about your safety.

The Ultimate Guide To Delicious And Nutritious No Cook Vegan Backpacking Food

Are you planning a backpacking trip and looking for delicious and nutritious vegan food options? Look no further! In recent years, veganism has become increasingly popular due to its various health and environmental benefits. However, finding vegan backpacking meals that don’t require cooking can be tricky. That’s why we’ve created this ultimate guide to help you have the best and most satisfying backpacking experience possible with no cook vegan food options.In recent years, veganism has become increasingly popular due to its various health and environmental benefits. When it comes to backpacking, finding vegan options that are easy to carry and require no cooking can be tricky. This guide will help you have the best backpacking experience possible with delicious and nutrient-packed no cook vegan food options.

Whether you’re a seasoned backpacker or a first-timer, this guide has got you covered. We’ve taken the time to research and compile the best no cook vegan backpacking food options to make your next outdoor adventure a memorable one. With our suggestions and tips, you’ll be able to pack and prepare tasty and nutritious meals without any hassle. Say goodbye to boring and unsatisfying trail mix and hello to delicious no cook vegan meals that will keep you fueled and energized all day long. So let’s dive in and explore the world of no cook vegan backpacking food!

Why Choose No Cook Vegan Backpacking Food?

No cook vegan backpacking meals offer many benefits over traditional cooked meals. One of the biggest advantages is the fact that they require no cooking at all, which means you can save a lot of time and energy. When you’re out in the wilderness, you don’t want to spend too much time cooking and cleaning up, and no cook vegan meals allow you to do just that. You can spend more time exploring the surroundings and enjoying the view, or even taking a well-deserved nap.No cook vegan backpacking meals are also much easier to prepare than traditional meals, which means you can spend more time doing the things you love. Instead of spending hours cooking and preparing meals, you can simply open up a packet of trail mix or energy bars and be on your way. This is especially useful when you’re on a tight schedule, or when you simply don’t have access to a stove or campfire. With no cook vegan backpacking food, you can enjoy a quick snack or meal whenever you need it.

In addition to being convenient, no cook vegan backpacking food is also much lighter and takes up less space in your backpack. This is important because you don’t want to carry heavy and bulky food items with you on your trip. No cook vegan meals are often dehydrated or compressed, which makes them compact and easy to carry. This means you can pack more food without adding extra weight to your backpack.

Another advantage of no cook vegan backpacking food is that it provides all the necessary nutrients needed to fuel your adventures. Vegan food is rich in protein, fiber, and essential vitamins and minerals. With the right combination of ingredients, you can create delicious and nutritious meals that will keep you going all day. Whether you’re hiking up a mountain, exploring a new trail, or simply spending time in nature, it’s important to fuel your body with nutritious food. No cook vegan backpacking meals can help you do just that.

Best No Cook Vegan Backpacking Foods

If you’re looking for a more substantial no cook vegan backpacking meal, try making your own vegan trail mix. This is a great option if you’re a picky eater or have dietary restrictions. You can choose your own mix of nuts, seeds, and dried fruits to create a meal that satisfies your taste buds and keeps you full. Nuts are a great source of healthy fats and protein, while dried fruits provide natural sugars and essential vitamins and minerals. Just be sure to pack your trail mix in an airtight container to keep it fresh and prevent it from getting smashed during your trip.

Another option for a no cook vegan backpacking meal is homemade energy bars. Energy bars are easy to make and can provide a quick and nutritious snack. You can use ingredients like oats, nuts, seeds, and dried fruits to create a balanced meal that will keep you fueled and energized. Simply blend the ingredients in a food processor, press into a pan, and cut into bars. You can then wrap them in parchment paper to take with you on your trip. Energy bars are also a great option for a mid-hike snack or a post-workout treat.

Tips for Packing and Preparing No Cook Vegan Backpacking Food

A third option for a no cook vegan backpacking meal is dehydrated meals. You can purchase pre-made dehydrated vegan meals at outdoor stores, or you can make your own. Dehydrated meals are lightweight and easy to prepare. Simply add hot water to the package, let it sit for a few minutes, and your meal is ready to eat. You can make your own dehydrated meals by using a food dehydrator or oven. You can dehydrate cooked pasta, vegetables, and sauces to create your own instant meals. This is a great option for those who want a hot meal without the hassle of cooking. Just be sure to pack the dehydrated meals in sealed bags to keep them fresh and prevent any spills.

If you’re looking for a savory no cook vegan backpacking meal, consider making your own vegan cheese and crackers. You can use ingredients like cashews, nutritional yeast, and herbs to create a delicious and cheesy spread. Pair it with crackers or bread for a satisfying snack. This is also a great option if you want to add some variety to your trail mix or energy bars. Just be sure to pack the spread in a leak-proof container to prevent any spills. If you don’t want to make your own vegan cheese, there are also many store-bought options available. Look for vegan cheese and crackers that are lightweight and easy to carry.To add more variety to your no cook vegan backpacking meals, consider bringing fresh fruits and vegetables that don’t need to be refrigerated, such as apples, oranges, carrots, and celery. These provide a refreshing crunch and a good source of vitamins and minerals. You can also bring hummus or other vegan dips to pair with your vegetables. Lastly, don’t forget about hydration! Bring plenty of water with you, and consider packing some hydration tablets or electrolyte packets to add to your water. These will help replenish your fluids and prevent dehydration.

Conclusion

Another great option for a no cook vegan backpacking meal is hummus or other bean dips. These are easy to make at home or can be bought pre-made from the store. They are a great source of protein and fiber, and can be used as a spread for wraps or tortillas. Some good options to pair with hummus include fresh vegetables, crackers, or pita bread. If you’re feeling adventurous, you can also try making your own veggie wraps using thinly sliced vegetables and a hummus spread. Just be sure to pack the hummus and vegetables in airtight containers to keep them fresh and prevent any spills.

Finally, you can’t go wrong with fresh fruit for a sweet and healthy no cook vegan backpacking snack. Fruits like apples, bananas, oranges, and kiwis are easy to pack and provide natural sugars to keep you energized. If you’re looking for something more indulgent, try dipping fruit in melted dark chocolate or making your own fruit and nut bars. You can also bring along some vegan marshmallows and graham crackers to make s’mores around the campfire. Just be sure to pack the chocolate and marshmallows in a cool place to prevent melting. With these options, you’ll be sure to have delicious and satisfying meals and snacks on your next no cook vegan backpacking adventure.When it comes to packing for a no cook vegan backpacking trip, keep in mind that the key is to maximize nutrition while minimizing weight and space. With that in mind, choose portable, high-energy foods that won’t spoil easily, and pack them in small plastic bags or containers to save space. Be sure to also carry enough water and electrolyte supplements to stay hydrated. With the right plan and a bit of creativity, you can have a delicious and nutritious no cook vegan backpacking experience.

The Ultimate Guide To Throwing A Time-Traveling Feast: Delicious Dr. Who Birthday Party Food Ideas

Are you a fellow Whovian looking to throw the most amazing time-traveling feast for your birthday party? Well, look no further! We’ve put together the ultimate guide to Dr. Who birthday party food ideas that will have you and your guests feeling like you’re traveling through time and space with the Doctor.In this guide, we’ll explore a range of food options inspired by this iconic show. From easy-to-make appetizers to mouth-watering main dishes and sweet treats, we’ve got you covered. So roll up your sleeves, grab a spatula, and let’s begin planning your very own Whovian birthday party feast!

With its long history and avid fan base, Dr. Who has become a cultural phenomenon that’s beloved by millions around the world. And it’s no wonder why. With its time-traveling adventures, unforgettable characters, and delightful references to food and drink, the show has been inspiring fans for decades to create their own unique Whovian-inspired feasts. So whether you’re planning a big birthday bash or simply want to host a small gathering with friends, there’s no better way to celebrate your love of this incredible show than with some delicious and creative culinary creations.Building on the show’s love for all things food-related, this ultimate guide, filled with Dr. Who birthday party food ideas, explores a range of dishes that will transport party guests through time and space. From the simplest appetizers to more elaborate main course meals or desserts that are out of this world, get ready to impress your guests with an array of tasty treats that are sure to delight their taste buds.Whether you’re a fan of the classic episodes or the new ones, this guide offers something for everyone. With these Dr. Who inspired dishes, your guests will feel like they’re on their own time-traveling adventures, dining on delectable dishes like Gallifreyan Goulash, Cybermen Marshmallows, or even TARDIS-shaped cakes. So let’s dive in and explore the ultimate guide to throwing a time-traveling feast with delicious Dr. Who birthday party food ideas.

Time-Lord Terminals

When it comes to the Time-Lord Terminals, the possibilities are endless. Think about bite-sized snacks that have Who-inspired names to get your guests excited about the theme. If you are on a budget and strapped for time, you can opt for simple dishes such as ten-and-two flans or mini fish finger sandwiches with creme fraiche. However, if you have the time to invest in your snacks, you can try recipes such as smoked salmon tartar with arborio rice or even sonic screwdriver popsicles. Be sure to add a quirky touch to your Time-Lord terminals display as it will tie the food in with the overall theme of the party.

For even more inspiration, why not try creating Dalek-shaped pizzas with your favourite toppings? You can also build your own mini TARDIS using cheese and crackers, making this a fun food-activity for kids and adults to enjoy. To make your party even more immersive, you can label your dishes with funny and creative names inspired by the show’s inside jokes such as Jathaa Jaffa Cakes or Sontaran Spuds. This not only adds excitement to your party but also brings a touch of the show’s humor to the menu.For vegetarian or vegan options, you can try making Spinach and Feta Tart or Three-bean casserole. These hearty dishes are flavourful, easy to make, and a perfect balance between healthy and indulgent. You can also make a customized platter featuring a variety of different dishes with fun names that relate to the show, such as Sonic Burgers, Zygon Pasta Bake, or Gallifreyan Goulash. Be creative while naming your dishes, as this will surely bring a smile to your guest’s faces.Another great main dish option for your Dr. Who birthday party is stuffed pork roast, which is inspired by the Vincent and The Doctor episode. You can also keep things simple yet a hit for all Dr. Who fans with classic fish and chips. Regardless of what you choose, your guests will be taken on a gastronomical journey through space and time.

The Main Dish

To make your Time-Lord Terminals even more immersive, consider incorporating decorations and props inspired by the show. For example, you can create a small “crash landing” display with a Judoon helmet and a “CRASHED” sign using cardboards. You can also make a mockup of a Dalek and use it as a centerpiece, or add little sonic screwdriver figures to your platters to make them part of the decor. The possibilities are endless, and you can truly let your creativity shine while planning your party.

When it comes to drinks to pair up with your appetizers, you can create a simple blue-coloured punch or mix a refreshing gin and tonic. You can also serve bottled water in TARDIS-shaped bottles or add dried cranberry to your wine to create a “Blood of Gallifrey” look. These quirky drink options are sure to add extra charm to your party.

When planning your Dr. Who birthday party, it’s important not to forget the sweets. To truly transport your guests through time and space, consider creating a variety of desserts with fun and creative names inspired by the show. For instance, you can make TARDIS-inspired cakes with frosting and edible silver balls for an unforgettable centerpiece. If you’re looking for small bites, you can make Cybermen Marshmallows or Dalek cupcakes for a festive touch. Of course, you can’t forget the classic Jelly Babies, a candy beloved by fans young and old.

But why stop at cakes and pastries? You can also try creating a Who-themed fruit platter using fruits in colors that relate to the show. For example, you can use green apple slices for the Daleks or blueberries for the TARDIS. For a refreshing and quick sweet, try out a sci-fi twist on s’mores by adding food coloring to make them look like Time Vortex S’mores. You can even whip up your own Gallifreyan bread pudding with some custard on top, providing a warm and delicious dessert that is sure to delight all of your guests.If you’re looking for more dessert ideas, why not try making Ood-shaped cake pops or Adipose macaroon-shaped cookies? These whimsical treats are sure to delight both kids and adults alike. Alternatively, you can make a Galaxy-themed dessert platter with cookies and brownies, and decorate them with edible silver stars and galaxy sprinkles. To cool down on a hot day, you can blend a homemade Blue Raspberry Slushie and add some blue food colouring to make it look like the Time Vortex. These dessert ideas are perfect for those who want to take their ultimate Dr. Who-themed birthday party to the next level.For a truly immersive experience for your guests, you can create a decorative photo booth with props inspired by the show. You can have a TARDIS standee, a life-size cardboard cutout of the Doctor or their companion, or even a “Bad Wolf” graffiti to pose in front of. You can also add small details like paper-cutout Sonic screwdriver or bow ties for guests to hold onto while posing. Just make sure to keep your camera ready to capture some unforgettable memories.

When giving out goodie bags to your party guests, consider including small, inexpensive items such as TARDIS keychains, Doctor Who stickers, or even themed candy. You can also include printed recipes of the dishes that were served to your guests, so that they can continue to explore the Who-inspired culinary adventure at home.

No matter what kind of Dr. Who birthday party food ideas you choose, make sure to have fun, get creative, and celebrate your love for the iconic sci-fi series in style. The show’s vast universe offers endless possibilities for your food, drink, and party decorations, so don’t hesitate to let your imagination soar. Happy planning!

Who-vian Sweets

When it comes to choosing the perfect main dish for your Dr. Who birthday party, the sky’s the limit. If you’re inspired by the Vincent and The Doctor episode, why not make a delicious stuffed pork roast? This dish is sure to impress and offers a great nod to the show. Alternatively, you could go for a classic dish like fish and chips. This dish is a fan favorite and a perfect option for those who love all things related to British cuisine. You can add a fun twist to the dish by using themed names like Cybermen Fish and Chips, or TARDIS on a Stick. There are so many options out there, so go for what speaks to you and don’t be afraid to have fun with it.Taking inspiration from different episodes, you can try your hand at a Three-bean casserole or a Spinach and Feta Tart. These options offer great vegetarian or vegan alternatives to meat dishes and are easy to prepare. You can choose to have a mix of dishes that are inspired by different seasons and episodes, or, if you like, you can stick to a specific theme. Whatever your preference may be, make sure to add some quirky names to the dishes to make them stand out.

One thing to keep in mind while preparing the main dish is to make sure it fits the dietary needs of all your guests. If you have guests with allergies or intolerances, make sure to have an option that they can enjoy as well. To make sure your main dish is a total hit, consider adding a fun presentation element to it. For example, you could create a platter with different dishes that are assigned to different time periods or characters in the show. Or you could present it in a way that it resembles the TARDIS or an alien space station. Additionally, you could create themed drinks like Ginger Beer inspired by the Spiders invasion in Arachnids in UK, Lime Cordial calling Chocolate Poisoning as an homage to Fourth Doctor’s era, and so-on. Make sure to include a drink menu that is appropriate for all ages and dietary preferences. With so many food options to choose from and fun ideas to incorporate, your Dr. Who-themed birthday party is sure to be a success.

Conclusion

When planning the main dish for your Dr. Who party, consider incorporating flavors from different countries and eras. For instance, you could include dishes that are inspired by the futuristic cuisine of the Ood or the traditional onion soup enjoyed by the Second Doctor. You could also go for flavours influenced from other cultures. For instance, if you’re going for a dish inspired by a specific place in Doctor Who, you could try replicating the dish from that region and incorporate local herbs, spices, and ingredients to give it a unique, authentic flavor. You could opt for a space-themed meal consisting of hotdogs or burgers to give it an American feel. Just make sure that the dish you choose to serve fits the theme of your party and your guests’ preferences.

Lastly, don’t forget to add a personal touch to your main dish. Get creative and use food colors or edible decor to transform your dish into something that reflects your love for the show. You could add edible eyeballs to make the dish look like a terrifying Weeping Angel, or use edible cake toppers to make a delicious portrait of the Twelfth Doctor or his companions. Similarly, you could use food coloring to give the dish a specific color to match a particular Doctor’s outfit or hair. Remember, the main dish is not just about the food, it’s also an opportunity to showcase your creativity and enthusiasm for all things Doctor Who. So don’t hesitate to let your imagination run wild, and your guests will be sure to appreciate your efforts.When it comes to crafting the perfect main dish for your Dr. Who birthday party, there are many different factors to consider. From guest dietary needs to incorporating flavors from different countries and time periods in the show, the possibilities are endless. By adding a personal touch to your dish and getting creative with edible decor or tasty twists, you can truly bring your party to life and celebrate your love for the Doctor Who universe. Don’t forget, you can also consider adding a themed drink menu to match your food options and make your guests feel even more immersed in the world of Doctor Who.Remember, the main dish is the centerpiece of your party feast, and it’s important to put some thought and attention into making it truly memorable. By incorporating different elements and flavors from your favorite Doctor Who episodes, you can create a menu that is both delicious and immersive. So let your creativity run wild, and don’t forget to have fun with it!Whether you choose to create a dish that evokes the classic fish fingers and custard combo, or go for something more modern like a Zygon Pasta Bake, the main dish is an essential part of any Doctor Who-themed birthday party. Take the time to experiment with different ingredients and presentation styles to find the perfect recipe that suits your tastes and your guests. With a little bit of imagination and flair, you can create a meal that is truly out of this world, and a party that you’ll never forget.

The Ultimate Guide To Using The Cuisinart 7 Cup Food Processor For Effortless Meal Prep

Do you ever find yourself struggling to keep up with meal prep during a busy week? Maybe you avoid cooking altogether because it just takes up too much time and energy. Well, the Cuisinart 7 Cup Food Processor is here to make your life easier. With its powerful motor and easy-to-use design, it can take care of all your food processing needs, from slicing veggies to pureeing soups. This guide will take you through everything you need to know about using the Cuisinart 7 Cup Food Processor for efficient meal prep. So let’s get started!The Cuisinart 7 Cup Food Processor is a versatile appliance that can help you transform the way you cook. With its high-performance motor and multi-functional blades, you can chop, slice, puree, shred and even knead dough with just a touch of a button. This kitchen gadget is great for meal prepping and can save you a considerable amount of time in the kitchen. Let’s dive into the details of getting started with your Cuisinart 7 Cup Food Processor.

Before you start using your Cuisinart 7 Cup Food Processor, it’s important to read the instructions provided by the manufacturer carefully. Be sure to familiarize yourself with all the parts and accessories and learn how to assemble and use them properly. Once the device is assembled, you’re ready to move on to the next step.

One of the most important things to keep in mind while using your Cuisinart 7 Cup Food Processor is to ensure that the food you are processing is not too hard or too soft. Foods that are too tough can damage the blade while soft foods can damage the device. Follow the manufacturer’s recommended size, shape, and texture of food to get the best result. With that said, let’s move on to the tips and tricks for efficient meal prep using the Cuisinart 7 Cup Food Processor.

Getting Started with Cuisinart 7 Cup Food Processor

To prevent damage to the blade or machine, it’s important to ensure that the food you are processing is not too hard or too soft. This means you should avoid trying to process foods that are hard, like bones or large seeds, as well as foods that are too soft, like ripe bananas or avocados. You want to aim for foods that fit the blade’s capacity, such as vegetables, fruits, nuts, and cooked meats. By following this simple rule, you can ensure that your food processor remains in good condition for years to come.It’s worth noting that certain foods require particular preparations before processing. For example, vegetables like potatoes and carrots should be chopped into smaller pieces and boiled or steamed before pureeing. Similarly, nuts need to be toasted before chopping to enhance their flavor and texture. These tips may seem small, but they can go a long way in ensuring a successful meal prep with your Cuisinart 7 Cup Food Processor.

Another essential tip for getting started with your Cuisinart 7 Cup Food Processor is to familiarize yourself with the food processor’s parts and accessories and how to assemble them correctly. The food processor comes with several parts, including the motor base, food chute, lid, pusher, blade, and bowl. Before using your food processor, it is essential to ensure that you understand how to assemble all the components correctly. This will prevent the processor from malfunctioning during use, which can be dangerous, ruin your ingredients, and damage the machine itself. Therefore, be sure to read the instructions that came with your Cuisinart 7 Cup Food Processor so that you can start on the right foot and make the process of assembling the food processor parts a lot easier.

Tips and Tricks for Efficient Meal Prep

Section 3: Tips and Tricks for Efficient Meal Prep

Paragraph 1 (120 words): The Cuisinart 7 Cup Food Processor can be a game-changer in the kitchen, but there are a few ways to use it more efficiently. For instance, chilling the blade and the bowl before processing can prevent the food from sticking to them. Additionally, cutting the food into smaller sizes before processing can save time.

Paragraph 2 (120 words): For soft foods, use the pulse function instead of continuous processing to prevent the food from turning into a paste. Moreover, always make sure to scrape the bowl and blade periodically to ensure even processing. Another tip for efficient meal prep is to avoid overfilling the bowl, as this can lead to uneven processing and damage to the machine. By following these tips, you can make the most of your Cuisinart 7 Cup Food Processor and minimize the time and effort required for meal prep.

Moreover, you can use your Cuisinart 7 Cup Food Processor for making smooth sauces, pesto, dressing, and dips. You can also grate cheese, grind nuts, and make dough using this appliance with great ease. With its powerful motor and functional design, it can be your go-to kitchen tool for various cooking needs. So, experiment with your food processor and explore its versatility to make your cooking experience more enjoyable and effortless.

Cleaning and Maintenance of Cuisinart 7 Cup Food Processor

Cleaning and Maintenance of Cuisinart 7 Cup Food Processor:

After using your Cuisinart 7 Cup Food Processor, there are a few cleaning and maintenance tips to keep in mind. First, it’s essential to disassemble the parts and wash them thoroughly in warm soapy water, using a non-abrasive sponge or brush. Avoid using harsh cleaning agents that can scratch the plastic or metal parts. Make sure to dry the parts immediately after cleaning to prevent rust. For tough stains or food residue, you can use a vinegar and baking soda solution to soak the parts for a few minutes before washing. Always read the manufacturer’s instructions for specific cleaning and maintenance tips.

Additionally, you should also take care of the motor base by wiping it with a damp cloth, making sure not to immerse it in water. Never use abrasive cleaners or scouring pads on the motor base, as this can scratch the surface or damage the electrical components. To prevent any damage to the motor, avoid overfilling the processor, and never force the food into the feed tube. Regular maintenance of your food processor will ensure its longevity and efficiency, making it a valuable investment in your kitchen for years to come.In addition to regular cleaning and maintenance, there are a few other tips to keep in mind. First, always store your Cuisinart 7 Cup Food Processor in a dry and safe place, away from children or pets. It’s also essential to periodically inspect the blade and bowl for any wear or damage. Finally, if your food processor develops any issues, don’t try to fix it yourself, and instead, take it to a qualified technician for repair. By following these tips, you can ensure that your Cuisinart 7 Cup Food Processor remains in excellent condition and functions effectively for many years to come.

Conclusion

One more important point about maintenance is to replace the parts as needed to ensure that your food processor continues to operate smoothly. The blade and other parts of the processor are subject to wear and tear and may need to be replaced after some time. For example, if you notice that your blade is dull or chipped, it’s time to replace it. Most Cuisinart 7 Cup Food Processors come with replacement parts available for purchase. Be sure to consult the instructions that came with your food processor for the recommended replacement schedule. In addition, it’s always a good idea to have replacement parts on hand so that you can change them immediately when needed. Regular replacement of parts will ensure that your Cuisinart 7 Cup Food Processor continues to operate at an optimal level and saves you time and effort in the kitchen.

Another essential part of maintenance is proper storage of your Cuisinart 7 Cup Food Processor. Once you’ve cleaned and dried the parts, make sure they are stored in a cool and dry place, away from any heat sources. Avoid placing the parts near the stove or in direct sunlight, as this can cause warping and discoloration. You can also use the storage case that comes with most Cuisinart 7 Cup Food Processors to keep the parts organized and protected from dust and moisture. Finally, always make sure to store the bowl and blade separately to prevent any damage or dulling of the blade. Proper storage will not only prolong the life of your food processor but also save you time and effort when you need to use it next.

Uncovering The Mystery Behind Sheba Cat Food: Who Makes It And What’S Inside?

Are you in the market for a new cat food brand but don’t know where to start? With so many options out there, it can be difficult to know which brands are truly worth your investment. In this blog post, we’ll dive deep into one of the most popular brands of cat food on the market: Sheba. By understanding the history of Sheba and the ingredients that go into its cat food formulas, you’ll be better equipped to make an informed decision about whether this brand is right for your feline friend.One of the biggest selling points of Sheba cat food is its tasty-sounding flavors and sleek packaging. But is the brand really as good as it seems? In this blog post, we’ll take a closer look at who makes Sheba cat food and what ingredients are in it, so you can make an informed decision about whether this brand is right for your furry friend.

Let’s start by exploring the history of Sheba cat food. Did you know that Sheba was originally founded in Germany in 1948? However, it wasn’t until 1982 that the brand was acquired by Mars, Incorporated, a multinational manufacturer of pet food, confectionery, and other food products. With the backing of Mars, Sheba was able to expand and become one of the most widely recognized brands of cat food on the market. Today, Sheba is sold all over the world and offers a range of wet and dry cat food products.It’s important to note that the acquisition of Sheba by Mars has undoubtedly played a significant role in the brand’s success. However, the quality of the ingredients in Sheba cat food is also a big factor in why it’s so popular among cat owners. In the next section, we’ll take a closer look at the ingredients that go into Sheba’s cat food formulas.

The History of Sheba Cat Food

Now that we know a bit more about the history of Sheba cat food, let’s take a closer look at the origins of the brand. Sheba was originally founded in Germany in 1948 by German entrepreneur Paul F. Iams, who sought to create a high-quality cat food product that would stand out from the competition. However, it wasn’t until 1982 that Sheba was acquired by Mars, Incorporated, a multinational corporation known for its wide range of products, including snacks, pet food, and confectionery items. Today, Mars remains the parent company of Sheba and is responsible for producing and distributing the brand’s cat food products all over the world.

Thanks to Mars’ resources and expertise, Sheba cat food has been able to continually expand its product line and reach a wider audience. One of the brand’s most notable achievements is its development of a range of wet cat food flavors that cater to even the pickiest of feline eaters. Some of the most popular Sheba wet cat food varieties include chicken, salmon, tuna, and turkey, all of which feature real meat or fish as the primary ingredient. In addition to its wet food options, Sheba also offers dry cat food products that are similarly packed with natural ingredients to provide balanced nutrition for cats of all ages and activity levels.

Sheba Cat Food Ingredients

Now, let’s delve deeper into what exactly goes into Sheba’s cat food formulas. Sheba prides itself on using high-quality, natural ingredients in all of its products. One of the primary ingredients in its wet cat food varieties is meat by-products. These can include various animal internals such as liver and lungs. Additionally, Sheba uses fish, poultry, and poultry liver as its primary protein sources. The company also adds different carbohydrates, vitamins, and minerals to its formulas to ensure that it provides proper nutrition for felines. While the brand claims that its natural ingredients contribute to the nutritional value of its food, some cat owners are skeptical about the use of meat by-products in Sheba’s products.

The use of meat by-products in cat food has been a point of controversy among some cat owners. While these parts of the animal may provide nutrients, some argue that they can also include undesirable parts such as intestines and other unpalatable organs. However, it’s worth noting that the use of meat by-products is common in many cat food brands and is considered safe for consumption by the FDA. Despite this, Sheba has faced some criticism for its use of this ingredient. Ultimately, it’s up to individual cat owners to decide if they are comfortable with feeding their pets food that contains meat by-products. Consulting with a veterinarian is always a good idea when making significant changes to a cat’s diet.

Customer Reviews of Sheba Cat Food

According to customer reviews, Sheba cat food has received mixed feedback. Some customers have reported their feline friends having digestive problems after consuming certain flavors of Sheba’s wet food. Other customers say that the portion sizes are too small for the price. However, other customers have appreciated the brand’s use of natural ingredients and variety of flavors. It is crucial for cat owners to do their research and consult their veterinarian before making significant changes to their cat’s diet.Another common issue reported with Sheba cat food is the tendency for some formulas to have a strong odor. Some cat owners find the smell overwhelming, especially when the food is being microwaved or when leftovers are stored in the refrigerator. However, it’s worth noting that the strength of the odor may vary depending on the flavor of the food and individual cat preferences. It’s always a good idea to introduce new food gradually and observe your cat’s reaction closely to avoid digestive upset or other health complications.

In summary, while Sheba cat food has its pros and cons, it remains a popular choice among cat owners. Whether you opt for Sheba or another brand entirely, it’s important to keep your cat’s health and well-being in mind. One helpful tip is to read the ingredient list and nutritional information carefully to ensure that the food provides all the necessary nutrients your cat needs. Consulting with your veterinarian can also be beneficial, as they can provide insight on the right diet for your cat’s specific needs. Ultimately, the decision about whether or not to feed your cat Sheba cat food should be based on your cat’s individual tastes and dietary requirements.

Conclusion

Another important factor to consider when choosing cat food is the price point. Sheba cat food can be more expensive than other brands, which may be a limiting factor for some cat owners. However, it’s important to keep in mind that quality and price often go hand-in-hand when it comes to cat food. Cheaper brands may use lower quality ingredients, which may not provide the necessary nutrients for your cat’s health. It may be more beneficial in the long run to invest in a quality cat food brand like Sheba, which can help prevent health issues and expensive vet bills. Additionally, many pet stores and online retailers offer discounts and promotions on Sheba cat food, which can help make it more affordable for budget-conscious cat owners.

It’s also worth noting that Sheba cat food offers a range of options to cater to various dietary needs. For example, the brand offers wet and dry food options for adult cats, as well as food designed specifically for kittens and senior cats. Sheba also offers food for cats with special dietary needs, such as those who require a grain-free diet or are sensitive to certain ingredients. By offering a wide range of options, Sheba cat food ensures that there is a choice for every cat’s individual tastes and needs. Overall, whether you choose Sheba or another brand, it’s crucial to prioritize your cat’s health and nutritional needs above all else.