Mastering Baking: The Surprising Consequences Of Baking Without Baking Soda

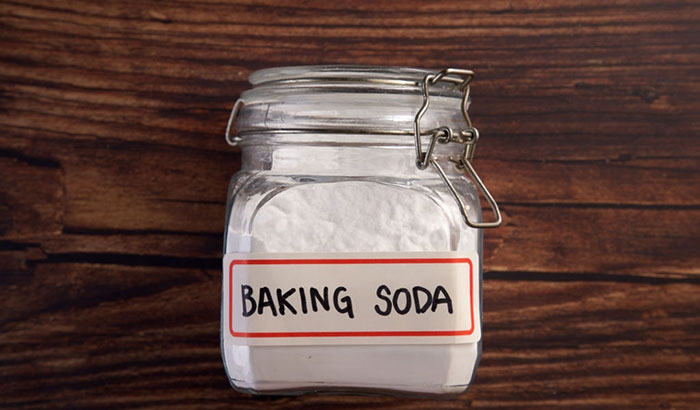
Baking is an art, and every ingredient plays a crucial role in ensuring that the final product comes out perfect. One such ingredient that is commonly used in baking is baking soda. Baking soda is a natural alkaline ingredient with a powdery texture and is commonly used as a leavening agent in baking.Baking soda is also known as sodium bicarbonate, and it is responsible for producing carbon dioxide when it is mixed with an acid. The carbon dioxide produced by baking soda helps the baked goods to rise and expand, resulting in airy and fluffy baked goods such as cakes, pancakes, and muffins.

In this blog post, we will explore what happens when you run out of baking soda and how it affects the final product. We will also discuss the science behind baking, the role of baking soda in baking and different substitutes that can be used instead of baking soda. So let’s get started and discover the surprising consequences of baking without baking soda!Baking soda is not just a leavening agent; it also helps in neutralizing the acidity of the batter, promoting browning and adding a unique flavor to the baked goods. So, without baking soda, our baked goods would be quite different from what we are used to. But, don’t worry, this is where baking soda substitutes come into play. In the next section, we will explore some common baking soda substitutes that can be used in a pinch.

The Science behind Baking

When baking soda is mixed with an acid ingredient, the two react and produce carbon dioxide gas. This gas gets trapped in the dough or batter, creating air pockets that allow it to rise when it’s baked. Without baking soda, there is no reaction, and as a result, the baked goods will not rise. Additionally, the lack of carbon dioxide means that the finished product will be denser and won’t have the same fluffy texture that baked goods made with baking soda would have.Furthermore, baking soda also helps to neutralize the batter’s acidity, which allows it to set and cook more evenly. It also promotes browning, leading to that delicious golden crust that we all know and love. So, in summary, baking soda is a crucial ingredient that serves multiple roles in baking, and forgetting it or running out can lead to significant changes in the final result.

It’s essential to understand the role of pH in baking if you want to know why baking soda is essential. There are two types of ingredients in baking: acidic and alkaline. When an acidic and alkaline ingredient mix together, they balance each other out and create a neutral solution. In baking, this balance between acidic and alkaline ingredients is incredibly important. If there’s too much acidity in the batter, the end product may be bitter, metallic, or not set properly. On the other hand, if there’s too much alkalinity in the batter, it can cause the batter to be too bitter or soapy. Baking soda helps to neutralize the acid in the ingredients, creating a more balanced environment that promotes even browning and a more consistent crumb.

The Consequences of Baking without Baking Soda

Another important thing to note is that baking soda can affect the taste of baked goods. Because it’s a base, it can have a slightly bitter or soapy taste if not used in the right amount or mixed with the right ingredients. But when used correctly, baking soda can enhance the taste of the final product. For example, a little bit of baking soda added to chocolate cake batter can bring out the rich chocolate flavor and make the cake taste more chocolatey. In summary, baking soda not only helps in providing lift and even baking, but it can also affect the overall taste of the final product.

It’s important to note that baking soda can also affect the color of the finished baked goods. When used in the right amount, it can help promote even browning and give the baked goods a beautiful golden hue. However, adding too much baking soda can cause the baked goods to become too dark, almost burnt, in color. It’s also important to note that using substitutes for baking soda may also have an impact on the final color of the baked goods, depending on the type of ingredient used.Expanding on the topic, it’s worth noting that using substitutes for baking soda can also have an impact on the texture of the finished product. Some substitutes may create more air pockets, resulting in a lighter and fluffier texture, while others may produce a denser, heavier texture. It’s essential to consider the purpose and desired outcome of the recipe when choosing a substitute for baking soda. Additionally, the quantity, acidity, and type of substitute used can also affect the final texture and taste. It’s always best to experiment and find what works best for your specific recipe and preference.

Baking Soda Substitutes

When baking soda is omitted from a recipe, it can significantly affect the final product’s quality. Baked goods without baking soda will be less fluffy, rising less and resulting in a more compact texture. They can also taste slightly different, as baking soda has a slightly salty flavor profile that can be noticeable in sweets and baked goods. In some cases, omitting baking soda can be somewhat compensated with acid components in the recipe. Adding ingredients such as sour cream or yogurt can help to make up some of the acidity lost when the baking soda is absent, and this can improve the flavor. However, using substitutes is not recommended in all recipes, as the results can be unpredictable.

If you end up running out of baking soda, the best option is to look for a recipe that does not require it or to get some baking soda at the store. If you decide to try baking without baking soda, be prepared that the texture and flavor will not be the same. However, it’s essential to keep in mind that baking is all about experimentation and creativity. Some people even prefer the taste and texture of baked goods without baking soda, so it’s okay to give it a try and see if it works for you. Just be sure to follow the recipe carefully, and if you’re going to make any changes or try using substitutes, do so cautiously and keep a close eye on the baking process.

Conclusion

In short, while baking without baking soda is possible, it’s not recommended. Baking soda is a crucial ingredient that plays a significant role in providing lift and texture to baked goods. Leaving it out can result in a denser, less fluffy final product with an altered taste and texture. If you are in a pinch and find yourself without baking soda, there are substitutes you can use, but the results may not be the same. In any case, it’s always a good idea to have baking soda on hand when doing any baking to ensure the best possible outcome. So, let’s make sure never to run out of baking soda and keep baking delicious treats!

Do you have any baking soda substitutes on hand? Don’t worry if you don’t–there are still some things you can do. In general, it’s best to stick to recipes that do not require baking soda if you don’t have it. However, some substitutes work better than others, and these can include baking powder, cream of tartar, vinegar, lemon juice, and even yeast. You need to be careful when using substitutes as they can produce different results than the recipe intended. Some will create more lift, while others may give a slightly different flavor profile. That being said, it’s good to experiment with substitutes and see which ones work best with your favorite recipes.

The Top Halloween Baking Championship Winners Of All Time: A Deliciously Spooky List

Halloween is considered the best time of the year for many reasons, including the chance to dress up in spooky costumes, decorate the house with frightening props, and indulge in lots of delicious sweets and treats. For foodies and dessert enthusiasts, the Halloween Baking Championship show is an exciting event that combines all these things into one thrilling experience.The show features some of the best bakers around the world showcasing their skills and coming up with some of the most creative and spooky treats imaginable. From creepy cakes to monstrous cupcakes, these bakers are ready to scare and delight you. So, if you’re looking for some Halloween baking inspiration, look no further than the Halloween Baking Championship – and our list of the top winners of all time!

In this blog post, we’ve put together a list of the most talented and creative bakers who have taken home the gold on the Halloween Baking Championship. We’ve also included some of the runners-up who gave them a tough competition and some of the honorable mentions who left an unforgettable mark. We’ve organized the list by their place in the competition, so that you can see who came out on top each season. Whether you’re a fan of the show or just looking for some Halloween baking inspiration, this list is sure to satisfy your sweet tooth and your love for all things spooky. So sit back, get ready for some chills and thrills, and let’s dive in!

First Place Winners

First Place Winners:

The Halloween Baking Championship has had some truly impressive winners over the years, but these first place bakers truly stand out. From their intricate designs to their delicious flavor combinations, these bakers have proven time and again that they have what it takes to create the perfect Halloween treat. Let’s take a closer look at some of the most impressive first place winners in the show’s history.First Place Winners:

The Halloween Baking Championship has had some truly impressive winners over the years, but these first place bakers truly stand out. From their intricate designs to their delicious flavor combinations, these bakers have proven time and again that they have what it takes to create the perfect Halloween treat. Let’s take a closer look at some of the most impressive first place winners in the show’s history.

One of the most memorable first place winners was Jane from season 2. She wowed the judges with her terrifying yet delicious haunted swamp cake, which featured swamp green jelly, a realistic alligator, and a poisonous snake.

Another standout first place winner is Pat from season 3, who impressed with her haunted fairy tale castle cake that featured a ghoulishly green interior and edible flowers.

Finally, it’s impossible to talk about Halloween Baking Championship winners without mentioning Zoe, the youngest competitor to ever win first place. In season 4, she created a creepy and delicious spider cake that was so realistic, it made the judges’ skin crawl.

These first place winners are just a few examples of the incredible talent that has graced the Halloween Baking Championship stage over the years. Each one brought their own unique skills and creativity to the competition, and it’s clear that they were all truly passionate about Halloween baking. Even if you’re not a fan of spooky treats, it’s hard not to appreciate the amount of work and dedication that goes into creating these impressive confections.

And of course, the first place winners aren’t the only stars of the show. Second place winners and honorable mentions have also made their mark on the competition and deserve recognition for their incredible baking skills. Let’s take a look at some of these talented bakers in the next section.

Second Place Winners

Paragraph 1 of Section 3 (120 words): Third place may not have taken home the grand prize, but the bakers who have achieved this accolade are still impressive and worthy of recognition. Their imaginative and delectable treats have undoubtedly left us all in a state of awe. These talented bakers have shown remarkable innovation and skill, from their imaginative decorations to their mesmerizing flavor blends. The competition brings out the very best in every contestant, and third place winners have proved that they undoubtedly have the mettle to stand up against the very best. Let’s take a look at who made the cut for third place in the Halloween Baking Championship over the years.

Paragraph 2 of Section 3 (120 words): These third-place winners have demonstrated their superb baking abilities, especially when it comes to the Halloween theme. From intricate sugar work to spooky chocolate sculptures, their creations transport viewers to a world of whimsy and horror. These bakers have command over the requisite baking techniques, and they can merge fascinating flavors and styles to produce unique desserts. The Halloween Baking Championship is a notoriously challenging and competitive show, but these third-place winners make it seem effortless with their attentive planning, creative risk-taking and artistic flair. Their attention to detail and ability to harmonize in their works is one of the reasons why they stand out, despite not claiming the top positions.

Honorable Mentions

!c

Paragraph 3 of Section 3 (120 words): The third-place winners on the Halloween Baking Championship have shown that creativity and innovation are key to surviving in the competition. This is because the judges want to see bold and daring endeavors from the contestants. The bakers who achieve third place have adapted and overcome the show’s unique challenges with diligent consideration, resourcefulness, and attention to detail. They have displayed the ability to stay consistent throughout the rounds, and each time they come up with new and outlandish ideas that keep us hooked to the show. Such skills are not only admirable but also noteworthy, considering the challenging nature of the show and the pressure on the contestants to continually push the bar higher.

Conclusion

Paragraph 4 of Section 3 (120 words): Third place may not be the gold standard for some, but these bakers have shown that this competition is more about the journey than the destination. They have consistently wowed the judges with their impressive baking skills and ingenuity in each episode. The bakers who have achieved third place have left an indelible mark on the competition and deserve recognition for their outstanding contributions to the show. Besides, being on a show like the Halloween Baking Championship is enough of an achievement itself. These bakers have honed their craft, gained exposure, formed long-lasting bonds, and gained lifelong fans while showcasing the best of their talents. Their participation and success have ushered a new breed of Halloween bakers who have taken up the mantle from where they left off.

Paragraph 5 of Section 3 (120 words): By looking at third place winners of the Halloween Baking Championship, we can see how the competition has grown over the years, with contestants continuously working to improve their skills and reach ever-greater heights. They are proof that hard work, practice, and innovation pay off, and that creativity and skill are just as important as taking home the grand prize. The competition brings together the best bakers in the world and gives them a platform to showcase their talents like never before. These bakers undoubtedly deserve all the recognition that they have received, and their accomplishments show that there is no limit to what can be achieved with a dash of creativity and a truckload of passion.

The Wonders Of Baking Soda: From Cleaning To Cupcakes

Baking soda is more than just an essential for baking, it has been found to have numerous household uses such as cleaning, deodorizing, and even as a natural remedy. This product has been around for years being used by generations before us and up to this day, its usefulness has not diminished.Baking soda is a household product that has been used for many years in various ways. Its versatility and many uses have been proven over time, making it a product that is valued by many. From cleaning to deodorizing and even as a natural remedy, baking soda has become a staple in most homes. And when it comes to baking, the addition of just a small amount of this ingredient can make all the difference in creating delicious and fluffy desserts. In this article, we will explore the many wonders of baking soda, from its history as a household staple to its unique ability to transform desserts.

Whether you’re a professional baker or just a curious home cook, this article is for you. We will dive deep into the history of baking soda and understand why this ingredient has been around for so long as a household product. We will also take a closer look at how baking soda works in baking and what makes it so unique compared to other ingredients. By the end of this article, you will understand the many benefits of using baking soda in your baking, and have the tips and tricks you need to use it effectively in your kitchen.As we dive deeper into the history of baking soda, it’s fascinating to learn why it has been a household staple for so long. Unlike other ingredients, baking soda has the ability to transform desserts to make them light and fluffy, making it a popular ingredient among bakers. In the mid-19th century, baking powder was invented, which was a combination of baking soda and an acid. This created a leavening agent that could be used in recipes without the need for an acidic ingredient. Although baking powder quickly became the preferred option for baking, baking soda remained a popular ingredient for certain recipes due to its unique properties.Moving on to the next section, we will take a closer look at how baking soda works in baking. As mentioned earlier, baking soda is an alkaline substance that reacts with acidic ingredients, such as buttermilk, lemon juice, or vinegar, to create carbon dioxide. This gas is what causes dough or batter to rise and become light and fluffy. However, because baking soda is so powerful, it’s important to use the right amount and combine it with the right ingredients. It can be tempting to add more baking soda than necessary to achieve a greater rise, but this can actually backfire, causing the mixture to become bitter or even explosive.

The History of Baking Soda

Baking soda has an interesting history that stretches back to the 19th century, where it was quickly adopted as a household staple due to its many unique properties. In those days, baking soda was mostly used as a cleaning and deodorizing agent, and few people knew that it could be used in baking. It took the invention of baking powder, which was a combination of baking soda and an acid, to make people realize the full potential of this magical ingredient.As people began to experiment with baking soda in the kitchen, they discovered that it had a unique ability to react with acidic ingredients and create carbon dioxide. This gas caused dough or batter to rise and become light and fluffy, making it an essential ingredient in many baked goods. Today, baking soda remains a popular ingredient for certain recipes due to its unique properties.

But what exactly is baking soda and how does it work? Baking soda is a white crystalline powder that is composed of sodium bicarbonate. It is alkaline in nature and reacts with acidic ingredients, such as buttermilk, lemon juice or vinegar, to produce carbon dioxide gas. As this gas is released, it causes the dough or batter to rise and become light and fluffy. However, it’s crucial to use the right amount of baking soda and combine it with the right ingredients. Too much baking soda can cause the mixture to become bitter or even explosive, while mixing it with the wrong ingredients can result in a flat or dense product. Therefore, it’s essential to follow recipe instructions carefully and measure baking soda correctly.Another important aspect to consider when using baking soda is the freshness of the product. Over time, it can lose its potency, making it less effective in recipes. To ensure that your baking soda is still good to use, you can test it by mixing it with vinegar or lemon juice. If it fizzes, it’s still potent and can be used in your recipe. Additionally, combining baking soda with acidic ingredients, such as yogurt or brown sugar, can help activate the baking soda and ensure that your recipe rises properly. Keep these tips in mind when using baking soda in your next baking adventure!

How Baking Soda Works in Baking

Using baking soda in recipes can be a game-changer for many baked goods, especially those that require a light and fluffy texture. However, it’s essential to use the right amount and combine it with the right ingredients to achieve the desired result. That being said, baking soda is a versatile ingredient that can be used in many recipes to achieve different effects. For example, in addition to rising dough or batter, baking soda can also be used to improve browning or neutralize acids in recipes. It can even be used as a meat tenderizer! Overall, baking soda is a multipurpose ingredient that can be used in many recipes and outside of the kitchen. Its versatility and effectiveness have made it a household staple for generations.

If you’re looking to experiment with baking soda in your baking, there are many recipes out there that call for this versatile ingredient. In fact, many classic recipes, such as chocolate cake and chocolate chip cookies, call for baking soda as a leavening agent. However, keep in mind that not all recipes can be adapted to use baking soda instead of baking powder or other leavening agents. It’s important to follow recipes carefully and make sure that you’re using the right ingredients and amounts for the best results.

Aside from its use as a leavening agent, baking soda can also be used in combination with other ingredients to create unique baking creations. For example, combining baking soda with acid, such as vinegar or lemon juice, can create fizzy and bubbly effects in baked goods. Adding baking soda to batters or doughs can also help balance the acidity and produce a more neutral flavor profile. In short, baking soda is a versatile ingredient that can be used to create many unique and delicious baked goods.Sure, I can continue on the same paragraph. Another important aspect to consider when using baking soda in your baking is to avoid overmixing. Overmixing can cause the carbon dioxide to escape from the mixture, resulting in a dense or tough texture. To prevent this, mix the batter or dough until just combined and avoid overmixing. Additionally, when using baking soda in recipes, it’s important to remember its unique flavor profile. While it can neutralize acids and create carbon dioxide gas, it can also leave a slightly metallic or bitter taste if too much is used. Therefore, it’s essential to measure baking soda carefully and balance it with other ingredients to ensure the best taste. Keep these tips in mind and experiment with baking soda in your next baking adventure to see for yourself the wonders it can do!Let’s continue on the same paragraph, it’s also important to note that baking soda should not be confused with baking powder, as they are two different leavening agents with different properties. While baking soda reacts with acidic ingredients to create carbon dioxide, baking powder already contains an acid and can be used in recipes that do not require extra acidity. However, certain recipes, such as pancakes and waffles, may call for both baking soda and baking powder to achieve the desired texture and flavor. In these cases, it’s important to follow recipe instructions carefully and determine the right amounts of each leavening agent. By using baking soda and baking powder together, you can create fluffy and light baked goods with a perfect rise and flavor.

Tips for Using Baking Soda in Baking

How exactly does baking soda work in baking? When baking soda reacts with an acidic ingredient, such as buttermilk or lemon juice, the resulting chemical reaction produces carbon dioxide. This creates bubbles in the dough or batter, causing it to rise and become light and fluffy. However, it’s important to use the right amount of baking soda, as too much can cause your baked goods to become bitter or have a soapy taste. Additionally, it’s crucial to pair baking soda with the right ingredients that contain enough acid to activate the leavening process.Baking soda is an alkaline substance that reacts with acidic ingredients to create carbon dioxide, which makes dough or batter rise and become light. It’s essential to use the right amount of baking soda, as too much can cause a bitter or soapy taste, while pairing it with the wrong ingredients can lead to a flat or dense product. To get the most out of baking soda in your baking, you should carefully measure it, use fresh baking soda, and combine it with acidic ingredients like yogurt or brown sugar.

Another essential thing to keep in mind when using baking soda is that it needs to be balanced with other ingredients in your recipe. Not every recipe requires the same amount of baking soda, and adding too much can cause your baked goods to rise too quickly and then collapse. On the other hand, too little baking soda may not rise the dough at all, resulting in dense or flat baked goods. It’s also important to bake your dough as soon as possible after adding baking soda, because if it sits too long, the reaction may begin to diminish, and the baked goods won’t rise as much as they should. By combining baking soda with acidic ingredients, measuring carefully, and baking your recipe at the right time, your baked goods will turn out light, fluffy, and delicious.To make sure that your baked goods come out perfect, it’s crucial to store the baking soda correctly. You should keep it in an airtight container away from moisture or light that could affect its potency. Remember that baking soda is a versatile ingredient that you can use beyond baking, so you can get creative in your kitchen. You can use baking soda in recipes like fried chicken and pancakes, or use it as a natural deodorizer in your home. Overall, baking soda is a valuable ingredient that can make a big difference in your baking. Just remember to use it in moderation and combine it with the right ingredients to create the perfect final product.

Conclusion

When using baking soda in your recipes, there are a few things to keep in mind beyond just measuring and freshening it. Mixing baking soda with the wrong ingredients can cause your recipe to result in a flat product that doesn’t rise as expected. This is because baking soda requires an acidic ingredient to activate and create carbon dioxide. Mixing it with an alkaline ingredient, such as baking powder, will result in a chemical reaction that doesn’t help your recipe rise as it should.It’s important to pay particular attention to the ratios of baking soda and acidic ingredients you use in your recipes. Having the right balance can make all the difference in the outcome of your recipe. Adding too much baking soda will create bitter results, while too little will cause your recipe to fall flat. On the other hand, not using the right amount of acidic ingredients with baking soda will leave your desserts dense or dry. Keep these tips in mind, and you’ll be sure to have light, airy desserts that are simply irresistible.

Another tip for using baking soda in your baking is to sift it with the flour and other dry ingredients, rather than adding it directly to wet ingredients. This ensures that the baking soda is evenly distributed throughout the batter or dough, preventing any clumps that can cause uneven rising. In addition, you can also mix baking soda with a bit of hot water to create a paste, which can be added to recipes such as pancakes and waffles to give them an added lift. Alternatively, you can mix baking soda with cream of tartar, which creates a homemade substitute for baking powder. With these tips, you’ll be able to use baking soda in all kinds of recipes and achieve the perfect results you’re looking for.In addition to these tips, it’s important to remember that baking soda can have a slightly salty taste. As such, it’s important to balance out the flavors in your recipe accordingly. You can do this by adjusting the amount of salt or sugar in your recipe to your liking. Another important point to keep in mind is that while baking soda can help your desserts rise, it won’t give them their distinctive flavor. As always, it’s important to use fresh, high-quality ingredients and follow the recipe carefully to ensure the best possible results.When using baking soda in your recipes, make sure to store it in an airtight container in a cool, dry place to prevent it from clumping or losing its potency. Additionally, while baking soda can be a great addition to your sweet recipes, it can also be used in savory dishes as well. For example, you can use it to make crispy baked chicken or to help tenderize tough cuts of meat. With its versatility and unique properties, baking soda truly is a wonder ingredient in the kitchen.

The Science Behind Baking With Baking Soda: Can Baking Soda Raise Ph Levels?

Baking soda is a leavening agent that is commonly used in baking recipes to help baked goods rise. However, some people claim that it can also raise pH levels. In this blog post, we’ll take a closer look at the science behind baking soda and explore whether or not it can actually raise pH levels in your recipes.

Baking soda is a white crystalline powder that is also known as sodium bicarbonate. It’s a base with a pH level of around 8, making it slightly alkaline. When it’s combined with an acidic ingredient, such as vinegar, lemon juice, or cream of tartar, it produces carbon dioxide gas that helps your baked goods rise. However, the question remains: can baking soda raise pH levels in your recipes, and if so, what are the implications?

Do you wondering whether baking soda can raise PH level or not?

To start, it’s important to understand what pH actually means. pH is a measure of acidity or basicity in a solution, ranging from 0 to 14. A pH of 7 is neutral, while anything below 7 is acidic and anything above 7 is basic. In baking, pH levels can affect everything from the taste and texture to the appearance of your final product. If your recipe is too acidic, your baked goods may have a sour or metallic taste. On the other hand, if it’s too basic, they may have an unpleasantly alkaline taste and a soapy or bitter aftertaste. However, baking soda can help to neutralize acidity and balance pH levels in your recipes.

When baking soda is added to a recipe, it reacts with acidic ingredients to create carbon dioxide. This reaction causes the baked goods to rise and become lighter and fluffier. However, some people claim that baking soda can also raise pH levels in the dough or batter, which can affect the overall outcome of the recipe. In the following sections, we’ll explore the pros and cons of baking soda’s effects on pH levels and discuss whether or not it’s a good idea to use it in your recipes.

Baking soda can be a lifesaver in some recipes, especially those with strong or pungent ingredients like onions or garlic. Baking soda can help to neutralize the acidity of these ingredients, which can make them less overwhelming in a dish. Additionally, baking soda can help balance the flavors in recipes that call for acidic ingredients like tomatoes or citrus. However, too much baking soda can result in an overly alkaline taste and a soapy or bitter aftertaste. To avoid this, it’s important to use baking soda in moderation and in the right amounts for your specific recipe.

What is pH?

Before we get into the specifics of baking soda, let’s first define what pH actually means. pH is a measure of acidity or basicity in a solution, ranging from 0 to 14. A pH of 7 is neutral, while anything below 7 is acidic and anything above 7 is basic. When it comes to baking, pH levels can have a significant impact on the end result of your recipe. The ideal pH levels vary depending on the type of baked goods and can affect the taste, texture, and appearance of your final product.

pH levels can also influence the Maillard reaction, which is a chemical reaction between amino acids and reducing sugars that occurs during baking. This reaction is responsible for creating the golden brown crust on baked goods and contributes to their overall flavor and aroma. A balanced pH level can help enhance this reaction, while too much acidity can result in a burnt or bitter taste. On the other hand, a high pH level can inhibit the Maillard reaction and result in a pale or underbaked product.

Acidic ingredients like lemon juice or vinegar can react with baking soda to create carbon dioxide, which helps baked goods rise. This is why baking recipes often call for a combination of baking soda and an acidic ingredient, such as buttermilk or cream of tartar. The carbon dioxide produced during this reaction gets trapped in the dough or batter, causing it to expand and create pockets of air. These air pockets are what give bread and other baked goods their characteristic light and fluffy texture. However, it’s important to find the right balance of acidic and basic ingredients in your recipe. Too much of one or the other can throw off the pH balance and result in a less than desirable product.

The pH levels in your baked goods can be influenced by a variety of factors, including the type of flour used, the temperature of the ingredients, and the cooking time and temperature. Factors such as the acidity of your water or the age of your baking soda can also affect the pH levels in your recipe. It’s important to keep these factors in mind and make adjustments accordingly to ensure the best possible outcome. Additionally, understanding the science behind baking ingredients like baking soda can help you become a better baker and make more informed decisions in the kitchen.

How does baking soda affect pH levels?

Incorporating baking soda into your recipes can have a significant impact on the final product’s pH levels, as well as its texture and flavor. Baking soda is a base, with a pH level of around 8. When it’s added to a recipe, it reacts with acidic ingredients to neutralize the acidity and create carbon dioxide. This is what causes the dough or batter to rise, and contributes to the overall texture of the baked goods. Understanding how baking soda works can help you make more informed choices in the kitchen and achieve the best possible results in your baking. Some bakers even experiment with other types of bases or acids to achieve unique tastes and textures. However, it’s important to be mindful of the potential risks of overusing baking soda or other ingredients, and to find the right balance for your recipe.

When it comes to baking, knowing how to balance pH levels is key to achieving consistent and delicious results. As we mentioned earlier, overly acidic or alkaline ingredients can throw off the pH balance of your recipe and result in less than desirable outcomes. Fortunately, there are various ingredients and techniques you can use to balance the pH levels in your baked goods. For example, you might try adding a pinch of baking soda to your acidic ingredients, like tomatoes or citrus, to help balance the flavors. On the other hand, a splash of lemon juice or vinegar can help neutralize the alkaline taste of an ingredient like baking soda. Additionally, monitoring and adjusting the temperature of your oven can also play a role in balancing pH levels, as different temperatures can affect the acidity and color of your baked goods. Overall, achieving the right pH balance in your baking takes practice and experimentation, but the results are undoubtedly worth it.

Some other tips for balancing pH levels in baking include using certain types of flour or sweeteners. For example, whole wheat flour tends to be more acidic than white flour, so using a combination of the two can help balance the pH levels in your recipe. Similarly, using an alkaline sweetener like honey or molasses can help counteract the acidity of other ingredients in your recipe. Of course, the amount of each ingredient you use will depend on the specific recipe and your personal taste preferences. However, testing and adjusting your recipe can help you achieve the perfect balance of flavors and pH levels for your baked goods.

It’s also important to be aware of the potential health risks associated with consuming too much baking soda. While small amounts are generally safe for consumption, overuse can lead to a condition called metabolic alkalosis. This occurs when your blood pH becomes too alkaline and can result in symptoms like nausea, vomiting, and confusion. Additionally, baking soda can interfere with certain medications, such as those used to treat high blood pressure. As with any ingredient, it’s important to use baking soda in moderation and consult with a healthcare professional if you have any concerns. Overall, baking with baking soda can be a fun and rewarding experience when done safely and responsibly.

Fact: Some people think they can get rid of squirrels using Baking Soda? It is true or just a myth?

Pros and Cons of Baking Soda’s Effects on pH

Baking soda’s effect on pH levels is due to its base nature. As mentioned before, baking soda has a pH level of around 8, which makes it a powerful ingredient in neutralizing other acidic ingredients. When it’s mixed with an acidic ingredient, baking soda’s alkaline properties can help balance out the pH level of the recipe.The rise of carbon dioxide in baked goods due to the reaction between baking soda and acidic ingredients can also be a factor in the shift of pH levels. Carbon dioxide has a pH of around 5, which is more acidic than water. However, the levels of carbon dioxide produced by baking soda are usually not significant enough to cause a major shift in pH levels. Therefore, the primary way that baking soda affects pH levels in recipes is through its neutralizing effect on acidic ingredients.

While baking soda’s ability to raise pH levels can be beneficial in certain recipes, it’s important to be mindful of the quantity used. Overuse of baking soda can result in an alkaline taste and a soapy or bitter aftertaste. This can ruin the overall flavor of baked goods and make them unpleasant to eat. Additionally, too much baking soda can cause baked goods to rise too quickly, resulting in a collapsed or dense texture. It’s important to follow recipe instructions carefully and not to exceed the recommended amount of baking soda.

When baking soda is combined with acidic ingredients, it can create carbon dioxide gas which helps baked goods rise and achieve a light and fluffy texture. However, too much carbon dioxide can also lead to unstable foams and undesirable textures. Therefore, it’s crucial to find the right balance of ingredients in a recipe to ensure that your baked goods turn out perfectly. One way to avoid overusing baking soda is to combine it with an acidic ingredient like lemon juice or vinegar. The acid will react with the baking soda to create carbon dioxide, while also neutralizing the alkaline taste and keeping the pH levels balanced. This technique can be especially useful in recipes for items like cakes or muffins, which require a delicate balance of ingredients in order to achieve the desired texture and flavor.

Conclusion

In addition to the effects on flavor and texture, pH levels can also play a role in the appearance of baked goods. For example, pH levels can affect the color of baked goods, especially those with natural pigments like fruit or vegetables. A shift in pH levels can impact the way those pigments react and result in an unappetizing color like brown or gray. Therefore, using baking soda in the right amounts can help maintain the natural color of your baked goods.

The Magic Of Baking Soda: Perfect Pretzels Every Time

The Science of Baking Soda

Baking science is fascinating and it has revealed that baking soda is one of the key ingredients for making perfect pretzels. It is a leavening agent that produces carbon dioxide gas when heated, causing baked goods to rise and expand. Without baking soda, pretzels would not have their unique crust and soft yet chewy texture. In this blog, we will explore the science behind baking soda and the proper techniques to use it for the perfect pretzel recipe.When it comes to baking soda, there’s a lot more going on than just making things rise. It’s the secret ingredient that creates a beautiful brown crust and unique texture on pretzels. We will go through the different properties of baking soda and how to properly use it to take your pretzel-making to the next level.

Baking soda has alkaline properties, which are crucial for the maillard reaction – a chemical reaction that occurs between amino acids and reducing sugars in baked goods when exposed to high temperatures. This process is responsible for the formation of the pretzel’s signature brown exterior. The result is a visually appealing, delicious snack that is perfect for any occasion. Stick around as we dive more into how to use baking soda for pretzels.When making pretzels, baking soda is essential for achieving the characteristic texture and crust. In addition to adding to the pretzel’s quality, baking soda can also improve the color of the pretzels by giving them a beautiful golden brown hue. In the next section, we will discuss how to make the perfect pretzel dough to ensure that your pretzels come out looking and tasting great.Making the perfect pretzel dough is important for creating a pretzel that is both tasty and visually appealing. The classic ingredients for the dough are flour, salt, water, and yeast. However, the key ingredient for perfect pretzels is baking soda. Before dipping your pretzels into boiling water, you should make sure to let the dough rest and rise properly. This will improve the consistency of the dough and make it easier to shape. In the next section, we will explore how to properly boil the pretzels in baking soda for the perfect texture.

Making the Dough

To begin making the perfect pretzels, you’ll first need a great dough base. Start by combining flour, salt, water, and yeast to make a classic pretzel dough.When making the dough, it’s important to knead it thoroughly until it’s smooth and elastic. This can take several minutes and will help the dough to rise properly. Once the dough is ready, cover it with a clean towel and let it rise for at least an hour, or until it has doubled in size.After the dough has risen, divide it into equal portions and shape each portion into a pretzel shape. To do this, roll each portion into a long, thin rope and then curve the rope into a U-shape. Finally, twist the ends of the U-shape together to make the classic pretzel shape. Once you have shaped all of your pretzels, cover them with a damp towel and let them rest for a few minutes while you prepare the baking soda bath.

Adding baking soda to the boiling water can be a tricky process, but it’s essential to create that glossy golden brown color on the exterior of the pretzels. Fill a large pot with water and bring it to a boil. Once the water has boiled, carefully add baking soda to the water and stir well. It’s important to add enough baking soda to the water to ensure that your pretzels turn out perfectly.

When you add the pretzels to the boiling water, be sure not to overcrowd the pot. Depending on the size of your pot, you may only be able to boil one or two pretzels at a time. Once the pretzels are in the water, gently nudge them with a spoon to ensure they’re coated well with the baking soda solution. Let the pretzels boil in the solution for around 30 seconds, until they float to the top. After this time, carefully remove them from the water using a slotted spoon and place them on a towel to dry.After the pretzels have dried, it’s time to bake them in the oven. Preheat your oven to 425°F and lightly grease a baking sheet. Bake the pretzels on the sheet until they’re golden brown, which can take around 10 to 15 minutes. Be sure to keep an eye on them towards the end of the baking time, to avoid over-browning.

Once they’re ready, take them out of the oven and let them cool on a wire rack. You can serve them warm or at room temperature, and they’re perfect with a variety of dips and sauces. With a bit of practice and patience, you’ll soon be making pretzels that will rival those of your favorite bakery!

Boiling the Pretzels with Baking Soda

Paragraph 1 (120 words): Boiling your pretzels in a baking soda solution may sound unconventional, but it’s the secret to achieving that perfect pretzel texture. The process – which is also known as a “boiling alkali bath” – gives pretzels their classic shiny brown exterior and distinctive flavor profile. The baking soda solution increases the pH levels on the surface of the dough, causing it to break down and create a tacky surface that helps the salt and spices stick. This process also creates a unique chewy texture that sets pretzels apart from other baked goods.

Paragraph 2 (280 words): When boiling pretzels in a baking soda solution, it’s important to remember a few key tips. First, use a large pot with enough water to fully submerge the dough. This will ensure that the baking soda solution evenly coats the pretzel surface. Second, be sure to let the pretzels dry completely before baking. This will help them absorb the heat and achieve that perfectly golden, crispy texture. Finally, be careful not to overcrowd your pot – a few pretzels at a time will ensure that they cook evenly.

To create the perfect baking soda solution, you’ll need a few key ingredients. Add a 1/2 cup of baking soda to around 10 cups of water and stir until it has dissolved. Some recipes may call for the addition of other ingredients – like sugar or malt powder – to add extra flavor and aid in browning. After the water has come to a boil, reduce the heat slightly and carefully add the pretzels. Swirl them around in the solution for about 30 seconds, then use a slotted spoon to remove them one at a time and allow them to dry fully before baking. The result? Perfect pretzels that are sure to be a crowd-pleaser!For Section 3, we have covered the process of boiling the pretzels in baking soda solution. We have also discussed the key tips and ingredients involved in creating the perfect solution. But, we can still enhance this section to make it more informative and engaging. Here, you can include some interesting history about pretzels and their origin. You can also provide some recommendations about the type of flour and salt to use, as well as some creative and unique toppings for the pretzels. You can start with these ideas and develop your paragraphs further.

Baking the Pretzels

!c

Paragraph 4 (120 words): Pretzels have a long and storied history that dates back to medieval times. Some historians believe that pretzels were invented by Italian monks, who created the distinctive looped shape to represent arms crossed in prayer. Others suggest that the pretzel may have been inspired by a Celtic symbol of good luck. Regardless of their origin, pretzels have become an American staple and can be found everywhere from ballparks to street vendors.

When it comes to making pretzels, there are a few key ingredients that are essential for achieving that classic flavor and texture. Use high-quality flour – like bread flour or all-purpose flour – to create a sturdy and flavorful dough. Morton coarse kosher salt is a popular choice for pretzel salt, thanks to its large, distinct crystals that take longer to dissolve. You can also get creative with toppings – from classic mustard to sweet cinnamon sugar – to create a pretzel that’s uniquely yours.Sure, let’s continue with Section 3. Keep in mind that you already covered the process and tips for boiling pretzels in a baking soda solution. It would be great to add some information about the baking itself. You could discuss the ideal time and temperature for baking pretzels and how to achieve that perfect golden brown color. Additionally, you could provide some ideas for serving pretzels – perhaps with dipping sauces or different toppings.To further develop Section 3, you could also discuss the importance of using the right type of dough for pretzels. You could go into more detail about the role of yeast in creating the dough and discuss different techniques for shaping pretzels, such as rolling and twisting. Additionally, you could talk about how different types of flour can affect the texture and flavor of the dough, and provide some tips for choosing the right flour for your recipe. Finally, you could suggest some creative variations on the classic pretzel, such as pretzel dogs or pretzel bites.

Conclusion

Paragraph 5 (280 words): After boiling your pretzels in a baking soda solution, it’s time to bake them to crispy perfection. Preheat your oven to 425°F (218°C) and lightly grease a baking sheet. Place your pretzels on the baking sheet, making sure to leave enough space between them so they don’t stick together during baking.

One important thing to remember when baking pretzels is that the baking soda solution can cause them to brown more quickly than you might expect. Keep an eye on your pretzels and rotate the baking sheet periodically to ensure even browning. Depending on your oven, baking time can range anywhere from 10 to 15 minutes.

Once your pretzels are finished baking, remove them from the oven and let them cool for a few minutes before serving. While pretzels are delicious on their own, they also pair well with a variety of dipping sauces. Classic mustard is always a crowd favorite, while melted cheese or honey mustard make for tasty variations.

If you’re feeling adventurous, you can also experiment with different toppings for your pretzels. Everything from cinnamon sugar to jalapeno peppers can be used to add extra flavor and texture. For a sweet twist on a savory classic, try brushing your pretzels with melted butter and sprinkling them with cinnamon sugar before baking.

Overall, baking soda is the secret ingredient that transforms simple pretzels into a delicious treat with a crispy exterior and chewy interior. By understanding the science behind baking soda and following these simple steps, you can enjoy perfect pretzels every time. Whether you’re serving them at a party, enjoying them at a baseball game, or snacking on them at home, there’s no denying the crunchy, salty snackability of a freshly baked pretzel.

!cFor Section 3, we have discussed the process of boiling pretzels in baking soda solution and how to bake them to perfection. We have also covered some tips on toppings and dipping sauces, and discussed how baking soda can affect the browning process. However, we can further emphasize the importance of these techniques when it comes to achieving the perfect pretzel.

One important thing to keep in mind when boiling pretzels in baking soda solution is that timing is everything. Boil the pretzels for too long and they may become mushy, but not long enough and they may not have the right texture or flavor. It’s also important to let your pretzels dry completely before baking them. This will help ensure that they absorb the heat evenly and create that crunchy exterior that pretzels are known for.

Additionally, baking pretzels can be a delicate process. Keep an eye on your pretzels and rotate the baking sheet periodically to ensure even browning. Be careful not to overbake your pretzels, as this can lead to a dry and crunchy texture.

When it comes to toppings and dipping sauces, the options are truly endless. Some popular dipping sauces include classic mustard, cheese sauce, and honey mustard. For a sweet twist on a classic pretzel, try dipping them in melted chocolate or caramel. Adding unique toppings can also help elevate your pretzel game. Everything from sesame seeds to jalapeno peppers can be used to add extra flavor and crunch.

By following these expert tips, you can create pretzels that are crispy on the outside and chewy on the inside. Whether you’re making them from scratch or warming up a frozen batch, baking soda is the key to achieving that perfect pretzel texture. So the next time you’re in the mood for a salty snack, try making your own pretzels at home and see how easy it can be to create a delicious and authentic treat.Is there anything else I can help you with?

The Sweetest Triumphs: Celebrating The Top Kids Baking Championship Winners

From cupcakes to cookies, it’s undeniable that baking has become a beloved pastime of many households. And there’s no better way to witness talent than to watch the budding minds of children. One popular baking show for kids is the Kids Baking Championship on Food Network. The show not only showcases the incredible skills of these young bakers but also inspires the next generation to pursue their creativity. In this blog post, we’ll be celebrating the top Kids Baking Championship winners who stole our hearts with their remarkable talents and delicious creations.Baking has become a loved pastime in households across the world. With the rise in popularity of the activity, many are seeking ways to engage their children in the activity. The children’s baking competition has since grown in popularity, showcasing talented children on a baking platform to the world. This competition is none other than the Kids Baking Championship on Food Network. The show not only showcases the incredible skills of these young bakers but also inspires the next generation to pursue their baking creativity. Let’s take a deeper look into the winners of the competition.

Spanning over nine seasons, the Kids Baking
Championship has showcased the exceptional skills of children in the kitchen. These young baking enthusiasts put their heart and soul into creating delicious desserts and have won over the hearts of millions. With each season, new talents enter the kitchen, hoping to become the next Kids Baking Champion. The show tests the contestants’ baking prowess, creativity, and speed in creating beautiful desserts that not only taste good but look good too. In this article, we celebrate the top winners of the show, and their remarkable achievements in this delectable world of baking.In each episode of the Kids Baking Championship, these young talents push their limits in the kitchen to create amazing desserts. The recipes they come up with are often out-of-the-box and require significant skills to execute correctly. In addition to excellent baking skills, these kids also need to be able to work under pressure and take on frequent challenges and surprises thrown their way. It’s inspiring to witness the level of determination, creativity, and passion that these kids possess in the baking arena, and their triumphs are worth celebrating.The Kids Baking Championship winners are not just skilled young bakers but also inspirations for many children who love to bake. They prove that age is nothing but a number when it comes to pursuing one’s passion. Their achievements show that hard work, dedication, and the willingness to learn and adapt are essential ingredients for success. These young talents have achieved what many adults can only dream of, and their triumphs leave behind a sweet impression that will resonate with us for years to come.

Season 1 Winners

As we delve into the top Kids Baking Championship winners, we can’t help but marvel at their exceptional baking abilities, determination, and creativity. From intricate cake designs to boldly flavored pies, these young bakers have impressed the judges time and time again with their baking prowess. They have proven that baking is more than just a hobby; it’s an art that can be mastered with time, effort, and patience. It takes a certain level of imagination and talent to create visually stunning desserts that taste just as good as they look, and these kids have it in spades. Each winner has a unique story, and their inspiring journeys will have you yearning for a taste of their award-winning treats. So, let’s start with the very first winners of Kids Baking Championship, Paige Goehner and Natalie Reyes, and see what set them apart in the competition.

Paige Goehner and Natalie Reyes, the first-ever winners of Kids Baking Championship, have set the standard for future contestants with their exceptional baking skills. Paige, with her early start in baking, showed creativity and decorating skills that surprised the judges, including Duff Goldman and Valerie Bertinelli. Her cupcakes and cookies were infused with her unique style, making them stand out from the rest. Natalie, on the other hand, focused on taste, using unusual flavor combinations that thrilled the judges’ taste buds. Her impressive ability to balance flavors and textures made for a memorable impression.Despite their young age, these two girls showed remarkable dedication and tenacity in the kitchen. They continually pushed themselves to create delicious desserts that impressed the judges. Their experiences in the competition show that nothing is impossible with hard work and passion. They have proven that even the youngest of bakers can achieve greatness in this sweet world of baking. The first season of Kids Baking Championship will always be remembered for the exceptional talent displayed by the very first winners: Paige Goehner and Natalie Reyes.In addition to their baking skills, Paige and Natalie’s exceptional personalities contributed to their win in the first season. Paige’s positive energy and bubbly personality left a lasting impression on the judges, while Natalie’s calm and composed demeanor helped her to perform well under pressure. Their story sets the tone for the rest of the competition, where young bakers display impressive talent and extraordinary abilities in the kitchen. The show has acted as a platform for discovering new talent and showcasing their baking abilities to the world.These young bakers have proved that age is just a number and have shown exceptional resilience, determination, and passion throughout the competition. Over the years, many talented kids have participated in the Kids Baking Championship and managed to wow the judges with their baking prowess. From the remarkable creativity of Paige and Natalie to the science-infused desserts of Addison and Ansley, each winner has brought something unique to the table. In the following sections, we delve deeper into the stories of other winners and uncover the secrets of their success in the competition.

Season 4 Winners

In its first season, Kids Baking Championship gave us two talented winners, Paige Goehner and Natalie Reyes. Paige wowed the judges with her intricate decoration techniques, while Natalie’s flavorful desserts left a lasting impression. These two young bakers proved that hard work and passion can lead to sweet success, and inspired many young viewers to pursue their baking dreams.Paige’s love for baking began at a young age, and it was evident in every dish she prepared. Her ability to incorporate intricate designs in her desserts while maintaining their deliciousness was nothing short of impressive. Similarly, Natalie focused on combining unique flavors that the judges found delectable. The two winners of season 1 set the standard high for future contestants, demonstrating that age is not a barrier to creativity and talent.

Paige and Natalie’s passion for baking shone through in every challenge, and they tackled them with confidence and creativity. One of their most memorable challenges was creating apple desserts, which they both aced with unique takes on the classic fruit. They proved to the judges that they were not only talented, but also adaptable and open to trying new things. Their win not only motivated them to progress further in their baking journey but also inspired young viewers of the show. From season 1 onwards, Kids Baking Championship became a platform for young bakers to showcase their talent and make their baking dreams come true.Paige and Natalie’s achievements in Kids Baking Championship are no small feat. With hard work and diligence, they managed to become the first champions of a show that has inspired hundreds of children to pursue their passion for baking. It’s exciting to think about the kinds of desserts these young talents will create in the years to come, and it’s a testament to the diversity and creativity of the baking world.Paige and Natalie’s experience in the first season of Kids Baking Championship is a reminder of how young talent can exceed expectations – their creativity, focus, and skill set the stage for future seasons and participants. Being a baking champion goes beyond the title and fame, it’s also about much-needed inspiration for aspiring bakers. These young girls proved that with focus, dedication, and a passion for desserts, one can achieve sweet success.

Season 7 Winners

Season 4 of the Kids Baking Championship had not one, but two winners. Addison and Ansley managed to secure season 4’s title by delivering outstanding desserts every episode. Their passion for baking, combined with their creativity and talent, was palpable to everyone who watched the show. Addison’s baking journey began when she was only five years old while Ansley discovered her love for baking after watching her mother cook. Despite their different beginnings, these talented young bakers came with one mission: to impress the judges with their delicious masterpieces.Addison and Ansley’s superb cakes, pies, and other desserts demonstrated their incredible skill and flavor development, making them stand out among the competition. Their desserts were not only visually stunning, but also tasted just as delicious as they looked, which is no small feat for any baker, let alone a young one. Addison’s ability to decorate and beautify every sweet dish she made, combined with Ansley’s playful use of ingredients, kept their winning streak going.

Through their time on the show, Addison and Ansley showed impressive maturity and resilience, despite their young age. They consistently delivered exceptional desserts and remained calm under pressure while the cameras were rolling. Their ability to work together was also noteworthy, as they managed to balance their individual strengths and weaknesses, leading to their shared victory. Season 4 of Kids Baking Championship was not only a competition but a learning experience, and Addison and Ansley’s victories are proof that passion, hard work, and dedication can achieve amazing results.In season 4 of Kids Baking Championship, Addison and Ansley were not only talented but also showed great sportsmanship in the competition. They supported each other throughout the competition, even when they were going head-to-head. These young bakers have an exceptional talent and an eye for detail that is well beyond their age. Addison and Ansley’s shared victory proved that with hard work and determination, anyone can excel in the culinary world, regardless of their age. Their baking skills have left a lasting impression on the judges and audience, and we can’t wait to see what they have in store for us in the future.To celebrate their remarkable achievements, Addison and Ansley have become inspiration for young bakers across the globe. They have left a lasting impact on the baking industry by proving that no goal is too big to reach with determination and hard work. Their victories in Kids Baking Championship showed that talented young bakers are capable of achieving great things as long as they remain motivated and focused. They instill a sense of passion and determination that drives us to do better and to follow our dreams, no matter how challenging they may seem. Addison and Ansley are the perfect role models for anyone who loves baking, and they have undoubtedly raised the bar for the next generation of bakers.

Conclusion

Addison and Ansley’s stunning victories in season 4 of Kids Baking Championship proved that they are two of the most promising young bakers in the world. Their shared title, their talent, and their passion for creating delicious masterpieces have impressed both judges and audiences. Addison and Ansley’s charisma, maturity, and positive attitude were infectious, making the competition all the more enjoyable to watch. They both had a creative approach to baking, and their ability to develop unique flavor profiles was spectacular. These young bakers have pushed themselves to be creative and daring in their recipes while maintaining the flavor balance that is crucial in baking. Addison and Ansley managed to balance the art of baking by creating desserts that were both aesthetic and delectable.

Their winning streak is a testament to their perseverance, as they both faced daunting challenges and overcame them with flying colors. Their desserts stood out from the rest, impressing the judges with their precision and complex flavor combinations. Addison and Ansley’s creativity never faltered and always left the judges wondering what they would create next. With such incredible talent, it’s hard to imagine what Addison and Ansley will accomplish in the future, but one thing is for sure, their delicious mark on the world of baking will linger for a long time.

Addison and Ansley’s shared victory in season 4 of Kids Baking Championship has opened up doors for both of these young bakers. Addison Olsen, whose signature dishes included the famous “mermaid cupcakes” and a delicious fruit-inspired pie, has continued her passion for baking, her social media presence increasing her popularity, and earning her recognition for her skills. Ansley, on the other hand, has launched a custom cake business and continues to build her reputation in the baking industry.Addison and Ansley have proven to not only be remarkable bakers but also inspiring young role models with their impressive achievements at such a young age. They have earned praises for their baking skills and have managed to win the hearts of millions with their charisma, humility, and kindness. These young bakers have proved that age is just a number, and nothing can limit one’s skills and talents.

Addison and Ansley’s shared victory in season 4 of Kids Baking Championship was not just their own but a victory for every young baker who was encouraged to follow their passion thanks to these two role models. Their love for baking is contagious, and it has inspired many aspiring bakers to venture out and excel in their own right. By winning the hearts of the judges and the audience alike, Addison and Ansley have left a sweet legacy in the culinary world. They have blazed a trail for a new generation of young bakers, creating new possibilities for the future of baking.Sure, I can continue with the previous paragraph.

Addison and Ansley’s achievements have demonstrated that the baking industry is not just for adults. It has shown that young bakers can enter the field with the same passion, creativity, and skills as any seasoned baker. Addison and Ansley have set a benchmark for the next generation of young bakers with their imagination, ambition and hard work. Their determination to succeed and the hard work they put in is an inspiration to bakers of all ages. Bakers, both young and old, can take a page out of their book, and strive to reach even greater heights in the fascinating world of baking. Amidst the incredible desserts that they have created lies a message, which is to never give up on a dream and pursue it with every ounce of passion.

Does baking soda kill squirrels? Separating Fact From Fiction

Squirrels can cause significant damage to gardens and homes, especially in areas with a high population density. These cute creatures are known for their ability to chew through almost anything and can quickly become a nightmare for homeowners. While many homeowners try various methods to get rid of these pests, one of the most popular solutions that people turn to is baking soda. But does baking soda kill squirrels effectively? We’ll look into this in more detail.

Baking soda has long been touted as a solution to get rid of squirrels. It’s believed that baking soda can alter the pH levels in a squirrel’s bloodstream, causing the animal to die. This is because baking soda creates an alkaline environment that can be deadly to squirrels. However, does it actually work?

In this article, we’ll explore the truth about using baking soda to get rid of squirrels and try to separate fact from fiction. Homeowners rely on baking soda because it’s a readily available and inexpensive solution to this problem. But can baking soda kill squirrels, or is its effectiveness more of a myth? We’ll also discuss some of the alternative methods that can be useful in your efforts to get rid of squirrels on your property. Let’s dive in and learn everything there is to know about using baking soda as a squirrel control remedy.

Baking soda is not only used by humans, but squirrels also tend to snack on it. Some homeowners have attempted to put baking soda in bait, which squirrels then eat. However, does this work? While baking soda may be harmful to squirrels and can cause respiratory problems, it will not kill the animal. Inhaling baking soda can lead to painful respiratory issues that resemble asthma, but squirrels can recover from that. Baking soda does not cause death in squirrels, so using it to get rid of them isn’t an effective solution.

Why People Think Baking Soda Kills Squirrels

While there is a lot of speculation about baking soda’s effectiveness in killing squirrels, it is important to separate fact from fiction. Many people think baking soda can kill squirrels because it can drastically alter pH levels in their bloodstream. Research shows that baking soda can raise pH levels in a squirrel’s bloodstream, but this won’t necessarily lead to death.

While baking soda can create an alkaline environment in a squirrel’s bloodstream, it does not have the ability to kill them. More research has found that inhaling baking soda dust could lead to respiratory issues and even increase the risk for lung cancer over time. Therefore, it is important to reconsider using baking soda as a squirrel control option.

It is also essential to recognize that squirrels are valuable contributors to the ecosystem. They help in spreading seeds and keeping the balance of nature. Any method of getting rid of squirrels should do it humanely and shouldn’t cause them any harm. There are plenty of humane ways to get rid of squirrels, such as using trapping and relocating methods, ultrasonic devices, and safe and natural repellents. These alternatives won’t cause harm to the squirrels and are more effective in the long run than using baking soda.

In addition, baking soda can do more harm than good if it’s used improperly. It’s essential to keep it out of reach of pets and children, as it can cause harm if ingested. Ingesting baking soda can lead to stomach problems, vomiting, diarrhea, and seizures in humans and pets alike. It’s crucial to consider the safety of all involved when using any pest control methods. Therefore, it’s best to avoid using baking soda and opt for safer, more effective ways to deal with a squirrel infestation.

Fact: Baking Soda can raise PH level.

The Truth About Baking Soda Killing Squirrels

In conclusion, while many people think baking soda can kill squirrels, this is a myth. Baking soda can alter the pH levels in their bloodstream, but it will not necessarily lead to death. Additionally, baking soda can be harmful if ingested, which is why it’s not recommended as a pest control method. There are plenty of humane ways to get rid of squirrels, such as trapping and relocating methods, ultrasonic devices, and natural repellents. The solutions for each specific situation may vary, but it’s always essential to consider the safety of all involved and avoid using dangerous methods. With the right approach, it’s possible to get rid of squirrels humanely while protecting your garden and property.

As a homeowner, You need to understand that while removing squirrels may seem necessary, it’s crucial to recognize their importance in the ecosystem. The simple act of planting squirrel-proof tulip bulbs or hanging squirrel-proof bird feeders instead of an absolute removal can ensure that squirrels coexist beneficially with the environment without causing damage to your garden, home, or office.

It’s essential to know that squirrels are active members of the environment, and removing them can severely affect the ecosystem. Once you’ve identified a squirrel that needs to be removed from your home, ensure that you do it humanely, and stick to the necessary methods that protect them from harm. By doing this, you can be sure that you’ve done your part in preserving nature rather than destroying it.

Alternative Methods to Rid Your Property of Squirrels

According to experts, the truth about using baking soda to get rid of squirrels is that it is not an effective squirrel killer. While it can be harmful, baking soda does not have the ability to kill squirrels. Inhaling baking soda can lead to respiratory problems, but it will not result in the death of a squirrel. This is an important fact to remember when trying to figure out how to get rid of squirrels on your property.

When it comes to the safety of squirrels and the effectiveness of using baking soda to get rid of them, it’s essential to take the right approach. Homeowners should understand that baking soda may be harmful to squirrels, but it will not work as a long-term solution to a squirrel infestation. Instead, homeowners should focus on alternative methods that are both safe and effective for getting rid of squirrels. In the next section, we’ll outline some of these alternatives.

Trapping and relocating squirrels, using ultrasonic devices that emit high-frequency sounds, and spraying essential oils or using commercial repellents are all effective alternatives to using baking soda. These methods can be tailored to suit the specific circumstances at your property. Ultrasonic devices, for example, emit high-frequency sounds that are annoying to squirrels and drive them away. Similarly, natural repellents like peppermint oil can be effective in repelling squirrels from your garden. When using traps, homeowners should make sure to relocate squirrels as far from their property as possible to prevent them from returning. These alternative methods are humane, safe, and have been proven to be effective in getting rid of squirrels.

Conclusion

Other than the alternatives mentioned in the previous section, there are a few additional things you can do to prevent squirrels from infesting your property. One of the most effective things you can do is to trim any tree branches that hang near your home. These provide a convenient route for squirrels to access your attic or roof. Similarly, sealing up any holes or cracks in your walls or roof can also discourage squirrels from entering your home. Additionally, keeping your garden tidy and free of debris can make it less attractive to squirrels looking for shelter. By taking these preventative measures, you can effectively keep squirrels at bay and avoid the need for pest control.

In conclusion, while many people believe that baking soda can be used to kill squirrels, this is not an effective solution. Baking soda can be harmful to squirrels, but it will not result in their death. Instead, homeowners should use humane and effective alternatives such as trapping, ultrasonic devices, or natural repellents. By considering preventative measures and creating an environment that is less attractive to squirrels, you can keep squirrels at bay and avoid the need for pest control altogether.

Adding to the conclusion, it’s essential to remember that baking soda as a means of controlling squirrels is not only ineffective but can be dangerous. Inhaling baking soda can cause respiratory problems, and homeowners should prioritize the safety and well-being of squirrels. By following the tips outlined in this article, homeowners can safely and effectively prevent squirrel infestations on their property. Combining alternative methods with preventative measures can result in a more long-term solution that is both humane and effective.

The Sifting Secret: Why Sifting Flour Is Key To Perfect Baking

If you’re looking to up your baking game, the secret to success could be as simple as sifting your flour. Sifting is a technique that has been used in baking for centuries, but it’s often overlooked or dismissed as an unnecessary step. However, sifting flour brings many benefits – and not just for professional bakers. Whether you’re making bread, cakes, or pastries at home, sifting your flour can help you achieve the light, airy texture and tender crumb you’re looking for.Sifting flour is also important for removing lumps and impurities. Whether it’s leftover bits of insects or debris from the harvesting and milling process, flour can contain unwanted materials that can affect the taste and texture of your baked goods. Sifting ensures that these unwanted ingredients are removed, leaving you with a pure, clean flour that will produce consistent results. By removing these impurities and aerating the flour, you can create a beautiful, fluffy, and tender crumb in your baked goods.

In this article, we will explore the science behind sifting flour and why it’s such an important step in baking. We’ll also discuss the techniques for sifting flour, common mistakes to avoid, and how to get the best results possible. Whether you’re an experienced baker or just starting out, understanding the role that sifting plays in your recipes can make a huge difference in the outcome of your baked goods. So let’s dive in and discover why sifting flour is the secret to perfect baking!Sifting is not only important for removing impurities, but it also helps to measure the flour more accurately, as compacted flour can lead to an overly dense and heavy texture. By aerating the flour and ensuring an even consistency, it allows a smooth incorporation of the flour with other ingredients, which creates a consistent texture throughout the baked good. One of the great benefits of sifting is that it can also make for an aesthetically-pleasing output, especially when baking cakes and pastries.When it comes to techniques for sifting flour, there are a few options to choose from. One of the most common methods is to use a sieve, which is a handheld tool that you can use to sift flour quickly and easily. If you don’t have a sieve, you can also use a fine-mesh strainer or a flour sifter. No matter which method you choose, the key is to sift the flour onto a sheet of parchment paper or a bowl to catch any excess flour that may spill over. Mixing the sifted and unsifted flour before adding it to the batter can also help retain some of the larger flour particles for added texture.

The Importance of Sifting Flour

Sifting flour may seem like an extra step, but it’s well worth the effort. By taking the time to sift your flour, you can avoid a multitude of baking issues and achieve a light and airy texture in your baked goods. In this section, we’ll look at the importance of sifting flour. Not only does it remove impurities, but it also has a significant impact on the final product. When you sift flour, it adds air, which results in a fluffier and more tender texture.In addition to the benefits mentioned above, sifting your flour also helps to avoid clumping. Flour has a tendency to clump together, particularly if it has been sitting in a container for a while. By sifting the flour, you can break up any clumps and ensure a smooth texture in your baked treats. This is especially important when you are making delicate batters, such as soufflés or macarons that require a light texture. So, whether you are a beginner or an experienced baker, sifting flour is an essential step that should not be overlooked.

But sifting is not just about removing impurities and avoiding clumping. It’s also about achieving an even consistency and measuring the flour more accurately. When you scoop flour straight from the bag, you may end up with too much or too little, which can lead to an overly dense or dry texture. On the other hand, sifted flour will produce a more consistent texture in your batter or dough. This is because sifting not only removes lumps, but also aerates the flour, allowing it to mix more evenly with the other ingredients. The result is a lighter, fluffier baked product.

To make sure you’re sifting accurately, measure out the amount of flour you need for your recipe and sift it once or twice before adding it to your batter or dough. This way, you can avoid any clumps or impurities that might have accumulated in the flour, and ensure an even consistency. In the next section, we’ll take a closer look at the techniques you can use to sift flour.When it comes to sifting flour, there are several methods to choose from. One is to use a fine-mesh strainer. Another is to use a sieve, which is a bowl-shaped tool with a mesh bottom. A third option is a dedicated flour sifter, which is a hand-cranked tool designed specifically for sifting flour. While each of these methods will give you similar results, a dedicated sifter may be the easiest option if you plan to do a lot of baking.

Techniques for Sifting Flour

No matter which sifting method you choose, start by measuring out the amount of flour you need for your recipe. Then, place a sieve or strainer over a bowl or sheet of parchment paper. Add the measured flour to the sieve and tap it gently to sift the flour through. If using a flour sifter, fill it about halfway with flour and give it a few cranks to sift the flour.When sifting flour, it’s important to watch out for any clumps or debris that may be caught in the sieve or strainer. If you notice any clumps, you can either use a spoon or spatula to break them up, or if necessary, discard them altogether. After sifting the flour, you can either use it immediately or store it in an airtight container until you’re ready to bake.

It is also important to remember that sifting is not a substitute for proper measuring techniques; it is merely an additional step to ensure that your flour is consistent and free of impurities. So, instead of scooping flour straight from the bag or container, use a spoon to gently scoop the flour into your measuring cup, and level it off with a knife. This will help ensure that you’re measuring out the exact amount of flour your recipe calls for. In the next section, we will discuss common mistakes to avoid when sifting flour.

While sifting flour is a relatively straightforward process, there are a few common mistakes to avoid. One of the most common mistakes is sifting too much flour. This may seem counterintuitive, but over-sifting can actually remove too much of the protein in the flour, which can lead to an overly tender and crumbly texture. Another mistake is not sifting enough flour, which can lead to lumpy or uneven textures in your batter or dough. It’s important to balance the aeration benefits of sifting with the need to keep enough protein in the flour for structure.

Another mistake to avoid is using the wrong type of flour for your recipe. Different types of flour have different levels of protein, which can lead to different textures in your baked goods. For example, pastry flour has a lower protein content than all-purpose flour, which makes it ideal for delicate baked goods such as cakes and pastries. However, if you use pastry flour in a bread recipe, it may not rise properly. So, always make sure to use the right type of flour for your recipe.

Lastly, it’s important to store your flour properly. Flour should be stored in an airtight container in a cool, dry place away from sunlight and other sources of heat. Exposure to moisture or air can lead to clumps or spoilage, which will affect the quality of your baked goods. By avoiding these common mistakes, you can ensure that your baked goods are of the highest quality.When sifting flour, it’s important to remember that sifting is not a substitute for proper measuring techniques; it is merely an additional step to ensure that your flour is consistent and free of impurities. It’s also important to balance the aeration benefits of sifting with the need to keep enough protein in the flour for structure. Another mistake to avoid is using the wrong type of flour for your recipe. Lastly, always make sure to store your flour properly. Flour should be stored in an airtight container in a cool, dry place away from sunlight and other sources of heat. By avoiding these common mistakes, you can ensure that your baked goods are of the highest quality.

Common Mistakes to Avoid When Sifting Flour

One of the most common methods is using a sieve, which can be either a hand-held strainer or a larger, kitchen-sized one. This method works well, but it can be time-consuming when dealing with larger quantities of flour. Another option is to use a fine-mesh strainer, which is faster and easier than a sieve and yields similar results. A dedicated flour sifter can also be used for sifting flour, producing an even and consistent result. The best tool to use depends on your personal preference and the amount of flour you need to sift.When using a sieve or a fine-mesh strainer, it’s essential to tap the side of the sieve or strainer while sifting. This helps to release any trapped flour and ensures that all the flour is sifted evenly. Another option is to use a whisk or a fork to loosen any clumps in the flour before sifting. This can be especially helpful when working with denser types of flour, such as whole wheat or rye flour. Additionally, using a flour sifter with a mechanical crank can simplify the task and speed up the process.

To make sifting more manageable when working with larger quantities of flour, it’s also essential to sift in batches. For example, you can sift one cup of flour at a time, instead of trying to sift an entire bag of flour at once. This will help to prevent over-sifting or under-sifting, and ensure the flour is sifted evenly and thoroughly. When mixing the sifted and unsifted flour, use a whisk or a fork to combine gently. This will prevent overworking the flour, which can lead to tough or dense baked goods. Finally, make sure to measure the flour correctly, by spooning it into the measuring cups instead of simply scooping it out with the cups, as this can lead to compacted flour and inaccurate measurements. By following these tips and techniques, you can master the art of sifting flour and take your baking to the next level.When you sift flour, it’s important to shake the flour through the sieve, rather than pressing it through. This helps to avoid over-Sifting and keeps the flour as light and airy as possible. Additionally, you can also sift other dry ingredients, such as cocoa powder or powdered sugar, to ensure all the ingredients are lump-free. Another method to prevent overworking the flour is to use a pastry cutter or a food processor to mix cold butter or shortening into the flour. This reduces the amount of time you need to spend working the flour with your fingers, which can cause the flour to become too warm and stop the dough from rising properly. Whether you’re making a pie crust or a cake, sifting flour is an easy way to achieve a light, tender crumb and ensure your baked goods turn out perfectly every time.

Conclusion

In addition to the traditional methods of sifting, there are also some more modern and innovative tools available that can make the process faster, easier, and more convenient. One such tool is an electronic flour sifter, which uses a motor to quickly sift the flour with the push of a button. Another option is a flour dispenser, which has a built-in sifter and dispenses the flour directly into your mixing bowl. These tools can be helpful for those who bake frequently or in large quantities, as they can save time and effort. However, they can be more expensive than traditional methods, so it’s important to consider your needs and budget before investing in these types of tools.When sifting flour, it’s also important to pay attention to the type of flour you’re using. Some types, such as cake flour or pastry flour, are already very finely milled and may not require sifting. Other types, such as whole wheat flour or rye flour, have a coarser texture and may require more sifting to achieve a smoother result. Additionally, some recipes may call for the flour to be sifted with other dry ingredients, such as baking powder or cocoa powder, to ensure they are evenly distributed throughout the batter. By understanding the needs of your recipe and choosing the right tools and techniques for sifting, you can achieve perfect results every time.

Finally, it’s important to store your flour properly to ensure that it stays fresh and free from contaminants. Flour should be stored in an airtight container in a cool and dry place, such as a pantry or cupboard. This will prevent moisture, pests, and odors from affecting the quality of your flour. Additionally, it’s a good idea to label the container with the type of flour and the date it was purchased or opened. This will help you keep track of your inventory and ensure that you are using the freshest flour possible. Avoid storing flour near spices, strong-smelling foods like onions and garlic, or cleaning supplies, which can all affect the flavor and quality of the flour. With these tips in mind, you’ll be able to achieve perfect results every time you sift your flour, and your baked goods will be light, fluffy, and irresistible.To take your baking to the next level, consider experimenting with different types of flour and sifting methods to achieve new textures and flavors. For example, sifted almond flour can be used to make gluten-free, paleo-friendly baked goods, while sifted cornmeal can be used to create crispy, crunchy coatings for fried foods. Remember to measure your flour accurately, sift in batches, and use gentle mixing techniques to achieve the perfect crumb. By understanding the importance of sifting flour in baking, you can create delicious, professional-quality baked goods that will impress your friends and family.Don’t forget to be patient when sifting your flour. While it may take a few extra minutes, the results are well worth it. Properly sifted flour will result in lighter, fluffier baked goods with a more delicate crumb. Take the time to tap your sieve or strainer to ensure that all the flour is sifted evenly and remove any impurities that may affect the final texture. With practice and patience, you’ll become a master of sifting flour and elevate your baking game to new heights.

Baking Powder: The Key Ingredient For Perfect Baked Goods

Baking is much more than just mixing together ingredients and putting them in the oven. Understanding the science behind the ingredients used is the key to perfect baked goods. One such ingredient is baking powder.Did you know that even a small mistake in the quantity of baking powder can lead to a significant difference in the final outcome of your baked good? That’s why it’s essential to understand and use the right amount of baking powder in your recipe.Baking powder is also important because it helps create the texture of the baked good. It helps to leaven, or raise, the dough or batter, which creates air pockets throughout, making the finished product fluffy and light.

In this blog post, we will take a closer look at baking powder- what it is, how it works, and its importance in creating light and fluffy baked goods. Even if you’re an experienced baker, there’s always something new to learn about this essential ingredient. So let’s dive in and explore the world of baking powder!Baking powder is undoubtedly not the only ingredient present in baked goods, and its role may vary depending on what you’re cooking. But it’s definitely one of the most valuable tools at the disposal of bakers everywhere. In the next section, we will discuss in detail what baking powder is and how it works.

What is Baking Powder?

Baking powder is a combination of baking soda, also known as sodium bicarbonate, cream of tartar, and a moisture-absorbing agent like cornstarch. Cream of tartar is an acidic ingredient that activates the baking soda, and the moisture-absorbing agent helps keep everything dry and stable. When mixed with a liquid, the acid and baking soda react and produce carbon dioxide gas, which creates bubbles in the batter or dough and causes it to expand. Baking powder is used in a variety of baked goods, including cakes, muffins, biscuits, and quick breads. The amount of baking powder used in a recipe varies depending on the type of recipe and the desired outcome. Too much baking powder can cause baked goods to rise too quickly and then collapse, while too little can result in a dense and heavy texture. Therefore, it’s important to follow the recipe carefully and measure the baking powder accurately.

Baking powder is a versatile ingredient that is essential in baking. It is responsible for the rise and light texture of many baked goods, and it can also be used to tenderize meat, keep vegetables bright and to reduce odors when added to water. Double-acting baking powder is the most common type of baking powder found in grocery stores, and it is what most recipes call for. When compared to single-acting baking powder, double-acting baking powder provides a more consistent and reliable rise in baked goods, especially in recipes that require longer baking times. However, for recipes that require immediate lift, like pancakes, single-acting baking powder is the preferred choice. Knowing the types available and their intended use can help make the baking process more efficient and convenient.

Types of Baking Powder

One important thing to keep in mind when using baking powder is that it does lose its potency over time. To ensure that your baked goods turn out perfectly every time, it’s best to check the expiration date on the baking powder container and replace it if necessary. It’s also essential to store baking powder in a cool, dry place and away from any moisture because exposure to moisture can cause it to lose its effectiveness more quickly. By following these simple tips, you can ensure that your baked goods will rise properly and taste delicious.

Another important consideration when using baking powder is not to overmix the batter or dough. Overmixing can cause the baking powder to break down and release the carbon dioxide gas before the mixture is even put in the oven. This can lead to a less than desirable rise and texture in the final product. Instead, it’s best to mix the dry and wet ingredients until just combined to avoid overmixing. Once the batter or dough is mixed, it’s important to get it into the oven as quickly as possible to take advantage of the rising powers of baking powder.Continuing our discussion on baking powder, it’s interesting to note that other leavening agents, like baking soda and yeast, can be used in place of baking powder. However, these substitutes work differently and require adjustments to the recipe to ensure the proper rise and texture of the final product. If you’re interested in making substitutions or experimenting with different leavening agents, be sure to research and test the recipe to get the desired result. Finally, it’s worth mentioning that baking powder can add a unique flavor to baked goods, so choosing the right brand or creating homemade batches can elevate and personalize your baking creations.

How to Substitute Baking Powder in a Recipe

There are two types of baking powder: single-acting and double-acting. Single-acting baking powder reacts with liquid ingredients in the recipe and starts to produce gas immediately. This means that once the batter or dough is mixed, it needs to be baked right away. On the other hand, double-acting baking powder produces gas in two stages. The first stage is when it comes into contact with liquid ingredients, and the second is during the baking process. This means that the mixture doesn’t need to be baked immediately, and the leavening process will continue while it’s being baked. Double-acting baking powder is the most commonly used type of baking powder in recipes.

When using baking powder in a recipe, it’s important to use the correct type and amount to ensure that the baked goods come out light, fluffy, and with a good rise. If a recipe calls for double-acting baking powder and you only have single-acting baking powder on hand, you can still make the recipe, but you’ll need to make some adjustments. You’ll need to add a bit more single-acting baking powder than the amount of double-acting baking powder called for, and you’ll need to bake the recipe immediately after mixing to avoid losing any leavening power.

Conclusion

Another important thing to keep in mind when using baking powder in a recipe is that it can lose its potency over time. This is especially true if it’s exposed to moisture or air. To make sure that your baked goods rise properly, it’s a good idea to check the expiration date on your baking powder and replace it if it’s past its prime. If you’re not sure how old your baking powder is, you can do a quick test to see if it’s still active. Simply mix 1 teaspoon of baking powder with 1/3 cup of hot water. If it foams up right away, it’s still good to use.

In conclusion, baking powder is a key ingredient in creating light and fluffy baked goods. From understanding what baking powder is and how it works, to the types available and how to substitute it in a recipe, there’s a lot to know. Whether you’re a beginner baker or a seasoned pro, it’s important to take the time to learn about the ingredients you’re working with in order to achieve the best results. By following the tips and tricks outlined in this blog post, you’ll be able to create perfectly leavened baked goods every time.Continuing from the previous paragraph, knowing how to properly use baking powder will help prevent your baked goods from falling flat in the oven. Another tip is to always measure your baking powder carefully to avoid adding too much or too little to the recipe. Make sure to level off measuring spoons or cups to get an accurate measurement. With a little knowledge and attention to detail, you can elevate your baking game and impress everyone with your perfectly baked treats.Another thing to keep in mind is to avoid adding too much baking powder to your recipe, as this can cause your baked goods to have an unpleasant metallic taste. It’s also important to store your baking powder in a cool, dry place to keep it fresh and prevent moisture from affecting its potency. By following these tips, you can ensure that your baking powder always performs at its best and helps you create delicious, perfectly leavened baked goods every time.

5 Perfect Cooking And Baking Gifts That Any Foodie Will Love

The Perfect Stand Mixer for Any Kitchen

A stand mixer is an essential tool in any baker’s kitchen. Instead of kneading dough by hand, which can be tiresome and time-consuming, a stand mixer does all the hard work for you. With a stand mixer, you can create a wide variety of dishes, from fluffy meringues to dense bread doughs. The right stand mixer should be durable, versatile, and easy to use. One of the best stand mixers on the market is the KitchenAid Artisan Series stand mixer.The KitchenAid Artisan Series stand mixer is an incredibly versatile kitchen appliance that can handle a wide variety of tasks. In addition to mixing and kneading dough, it comes with a range of attachments that can be used to make pasta, grind meat, and even juice citrus fruits. With its powerful motor and sturdy construction, the KitchenAid Artisan Series stand mixer is a great investment for any home cook or aspiring baker. Its wide array of available colors also makes it an aesthetically pleasing addition to any kitchen décor.

The KitchenAid Artisan Series stand mixer has a powerful motor that can handle even the toughest doughs, making it a great choice for those who love to bake. Its ten speeds allow you to customize your mixing or kneading speed to fit your needs, whether you’re making a delicate meringue or kneading a dense bread dough. The bowl has a generous capacity of 5-quarts, making it great for large batches of dough or batter. Additionally, the mixer is easy to clean, and the attachments are dishwasher safe, saving time and effort when it comes to post-baking cleanup. Overall, the KitchenAid Artisan Series stand mixer is a versatile and durable tool that any foodie would be happy to have in their kitchen.

A Set of High-Quality Baking Pans

If you’re looking for a set of baking pans that can handle just about anything, the USA Pan Bakeware Aluminized Steel 6 Piece Set is a great option. The set includes a loaf pan, a half sheet pan, a jelly roll pan, and three cake pans of varying sizes, so you’ll have everything you need to tackle any baking project that comes your way. The pans are made from heavy-duty aluminized steel, which ensures even heating and consistent browning every time you use them. Plus, the nonstick coating makes for easy release and cleanup.In addition, these pans are oven safe and can withstand temperatures up to 450 degrees Fahrenheit, which means they’re perfect for just about any recipe you’ll come across. Plus, since they’re made from high-quality materials, they’re designed to last for years to come, making them a great investment for anyone who loves to bake.

Overall, investing in a set of high-quality baking pans is an excellent idea for anyone who enjoys baking. Not only will it make your baking easier and more efficient, but it will also elevate the quality of your baked goods. With so many different options available, it can be difficult to know what to choose. However, the USA Pan Bakeware Aluminized Steel 6 Piece Set is a great option that offers versatility, durability, and excellent baking results. Whether you’re an experienced baker or a beginner in the kitchen, this set is sure to help you take your baking to the next level.

The Ultimate Spice Set

!c

In addition to the USA Pan Bakeware Aluminized Steel 6 Piece Set, there are plenty of other types of baking pans to consider. For example, if you’re a fan of cupcakes or muffins, a good muffin pan is a must-have. Meanwhile, pie plates, bread pans, and pizza stones are all useful for creating specific types of baked goods. The key is to choose high-quality pans made from durable materials that will stand up to years of use. When you invest in good baking pans, you can be sure that your baked goods will turn out perfectly every time.When you have good baking pans, creating the perfect baked goods becomes easy and fun. There are numerous options on the market, ranging from muffin pans to bread pans, that cater to different types of baked goods. Choosing the right one depends on the specific needs of your recipes, though every baker should have a high-quality set of baking pans in their kitchen. Whether you are an experienced cook or just starting, a good baking pan will make all the difference in your efforts. With the USA Pan Bakeware Aluminized Steel 6 Piece Set, a perfect baking journey is just a few steps away.

A Comprehensive Cookbook

When it comes to spice sets, the FreshJax Grilling Spice Gift Set is a standout. This eco-friendly set includes 5 organic and sustainably sourced spice blends that are perfect for grilling and cooking delicious meals. The blends include Campfire, Grill Master, Smokey Southwest, Citrus Pepper, and Rosy Cheeks Maple Bourbon which are all handmade in small batches to ensure freshness and quality. Additionally, the spices come in glass jars to reduce plastic waste, and the packaging is 100% recyclable.Each spice blend is carefully crafted to add depth of flavor to a variety of dishes. For example, the Campfire blend is perfect for adding a smoky flavor to meats and vegetables, while the Citrus Pepper blend adds a tangy kick to salads and seafood. These unique blends make the FreshJax set a great gift for anyone who loves to experiment with different flavors in their cooking. Furthermore, the company strives to promote sustainable and eco-friendly practices which is an added bonus for those who are environmentally conscious.

Overall, the FreshJax Grilling Spice Gift Set is a thoughtful and unique gift for any foodie or grill enthusiast. Not only do the organic and sustainably sourced spices offer delicious flavor profiles, but they also promote environmentally friendly practices. With 5 different blends to choose from, each handcrafted with care, the recipient of this gift will enjoy experimenting with different flavor combinations and taking their grilling and cooking to the next level. The FreshJax Grilling Spice Gift Set is an excellent choice for giving the gift of flavor and sustainability.One of the benefits of the FreshJax Grilling Spice Gift Set is that it comes in eco-friendly packaging. The jars are made of glass which is a more sustainable material than plastic. This also reduces the amount of plastic waste that is generated. Additionally, the packaging is 100% recyclable which is a great bonus for those who are eco-conscious. Not only will the recipient of this gift enjoy the delicious flavors of the spice blends, but they can also feel good about making environmentally friendly choices.

A High-Quality Chef’s Knife

Whether they’re a grill master or a beginner in the kitchen, the FreshJax Grilling Spice Gift Set is the perfect gift to help them spice up their cooking. The variety and quality of the spices will inspire culinary creativity and elevate the flavor of their dishes. In addition, since the spices are eco-friendly and sustainably sourced, the gift represents a commitment to the environment and the future. The FreshJax Grilling Spice Gift Set offers a unique and flavorful option for those who want to give the gift of both taste and sustainability. This gift is sure to impress anyone who loves to cook or grill and values environmentally friendly practices.

To sum it up, if you are looking for an eco-friendly and unique gift for a foodie or grill enthusiast, the FreshJax Grilling Spice Gift Set is an excellent option. The set features five organic, handcrafted spice blends that offer a range of flavors that will elevate any meal. Moreover, the packaging is environmentally friendly and recyclable, so you can feel good about giving this gift. The FreshJax Grilling Spice Gift Set is perfect for those who want to experiment with different flavors in their cooking and appreciate sustainable and natural practices. Overall, this gift is sure to impress and delight any foodie, and is a thoughtful way to show appreciation for their passion for cooking.Let’s expand a bit on the benefits of the eco-friendly and sustainable packaging. Using glass jars instead of plastic is not only more sustainable, but it also helps to keep the spices fresh for longer. Glass is impermeable, which means that it doesn’t absorb food odors or flavors. Additionally, it’s a durable material that can be reused or recycled. By contrast, plastic packaging can be infiltrated by food and odors, leading to a shorter shelf life for the spices. Using glass jars in the FreshJax Grilling Spice Gift Set ensures that the spices remain fresh and flavorful even after prolonged periods. Furthermore, the recyclable packaging reduces landfill waste, so you can feel good about giving a gift that is both delicious and sustainable.

In conclusion, the FreshJax Grilling Spice Gift Set is an excellent option for anyone who is passionate about cooking and sustainability. It’s a unique and flavorful gift that offers organic and handcrafted spice blends that are perfect for grilling and cooking a variety of dishes. The eco-friendly packaging is a nice touch and shows that the recipient can enjoy the delicious spices while also reducing their environmental impact. With five different blends to experiment with, this gift is also a great way for them to expand their culinary palate and try new flavors. The FreshJax Grilling Spice Gift Set is a thoughtful and sustainable gift that any foodie would love to have in their kitchen.